


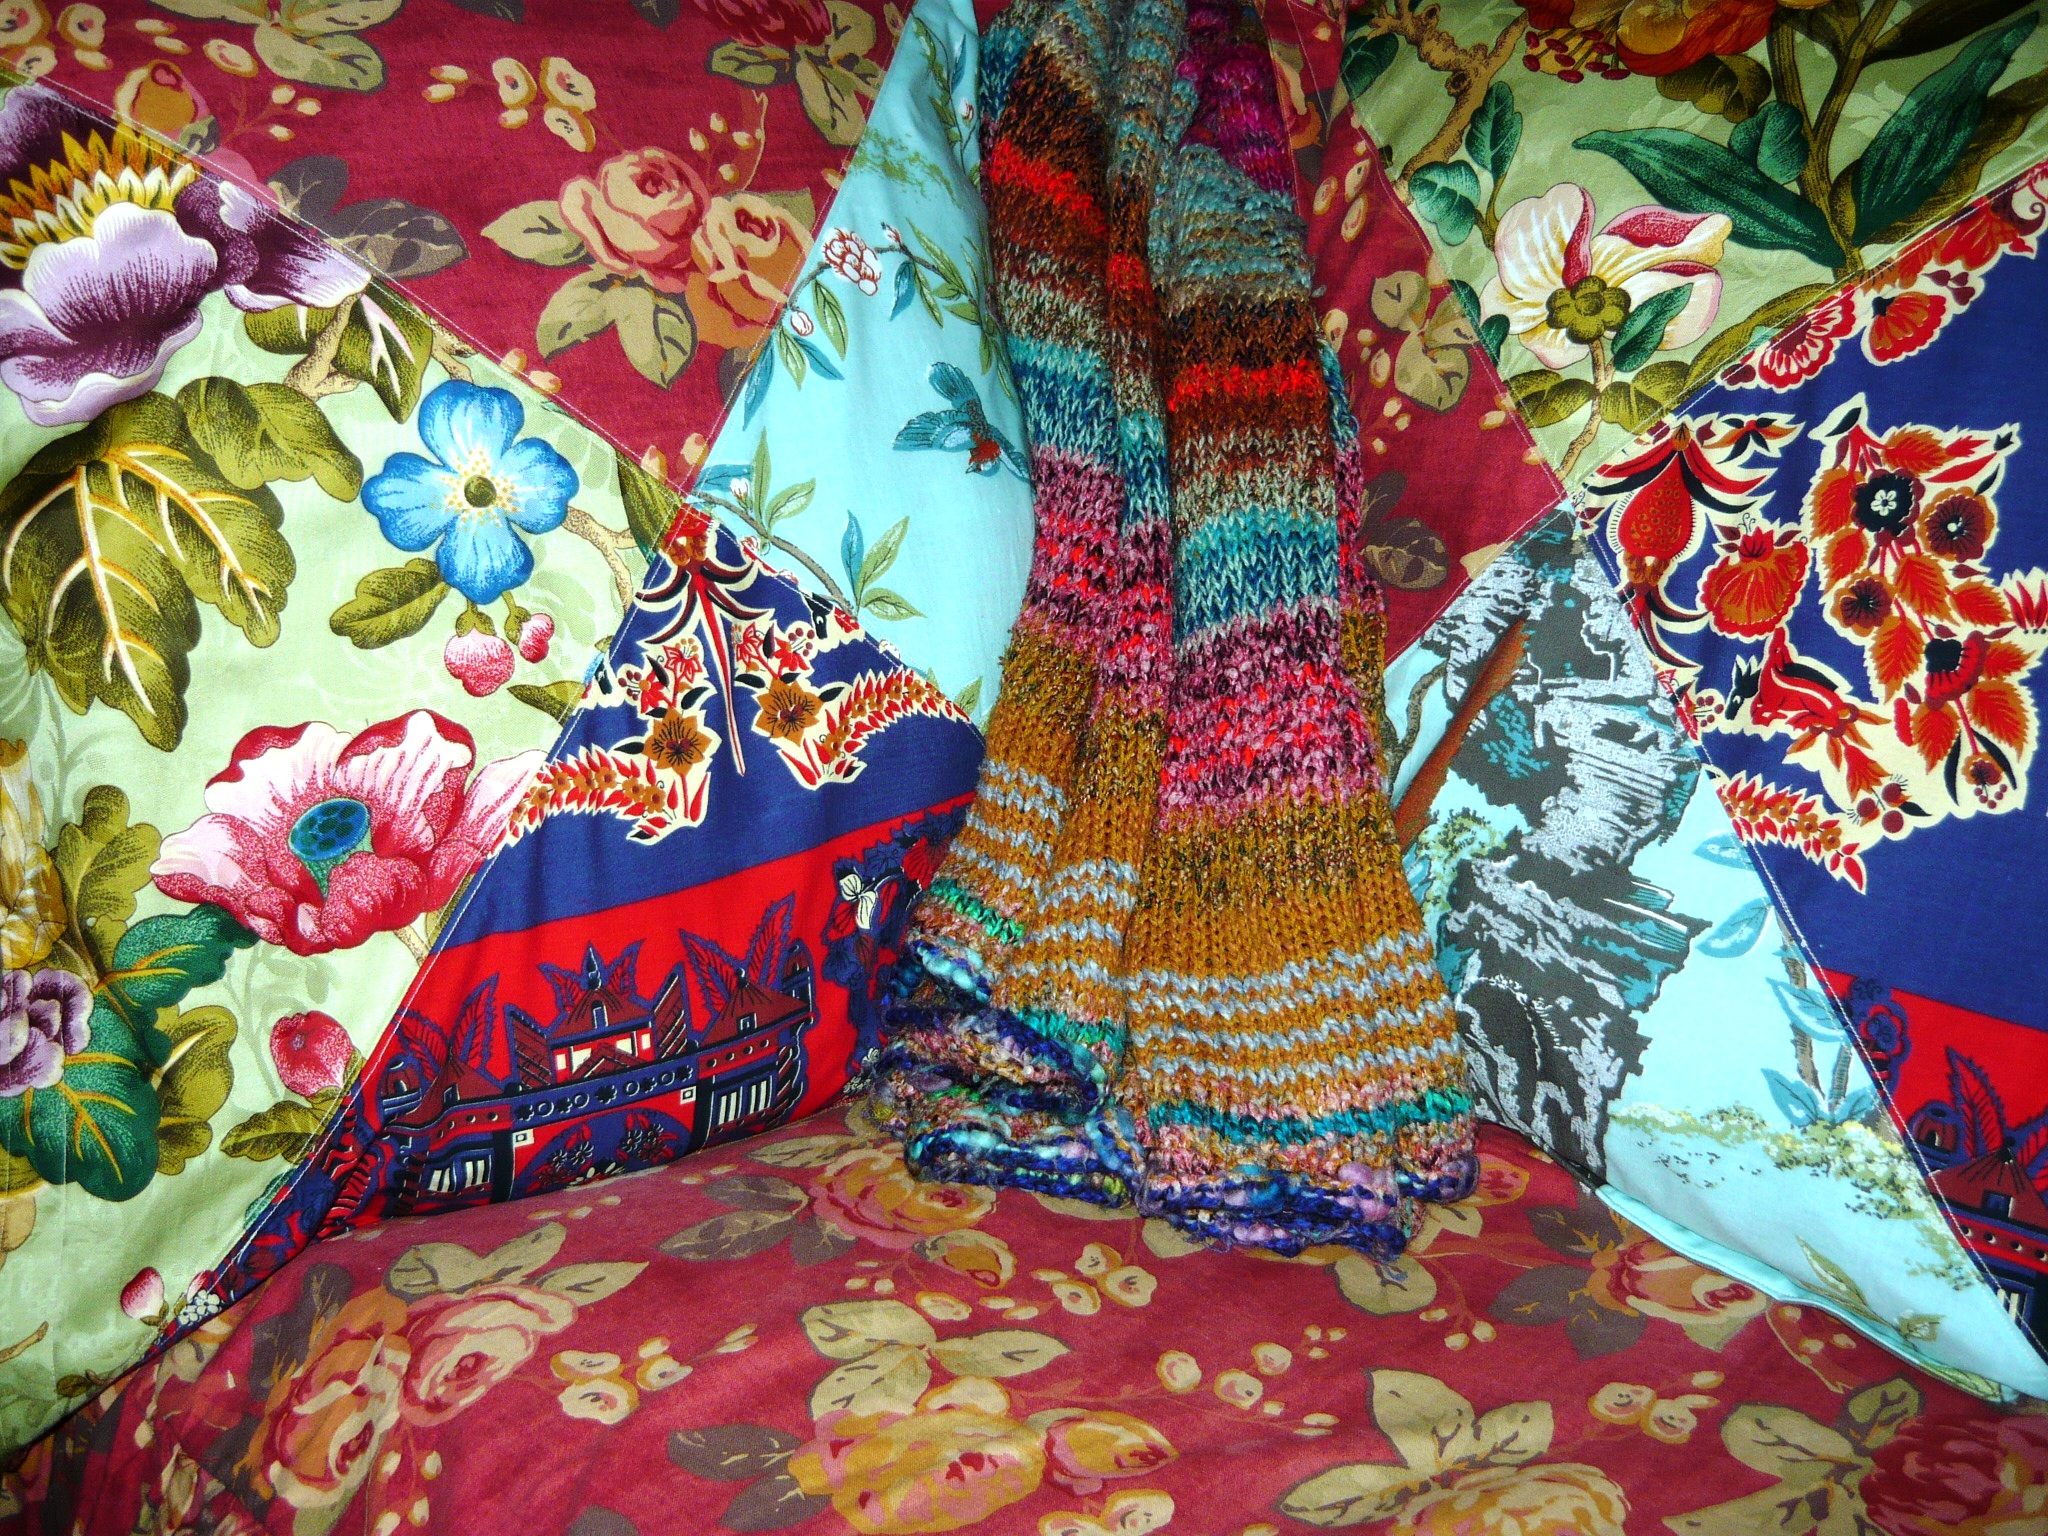
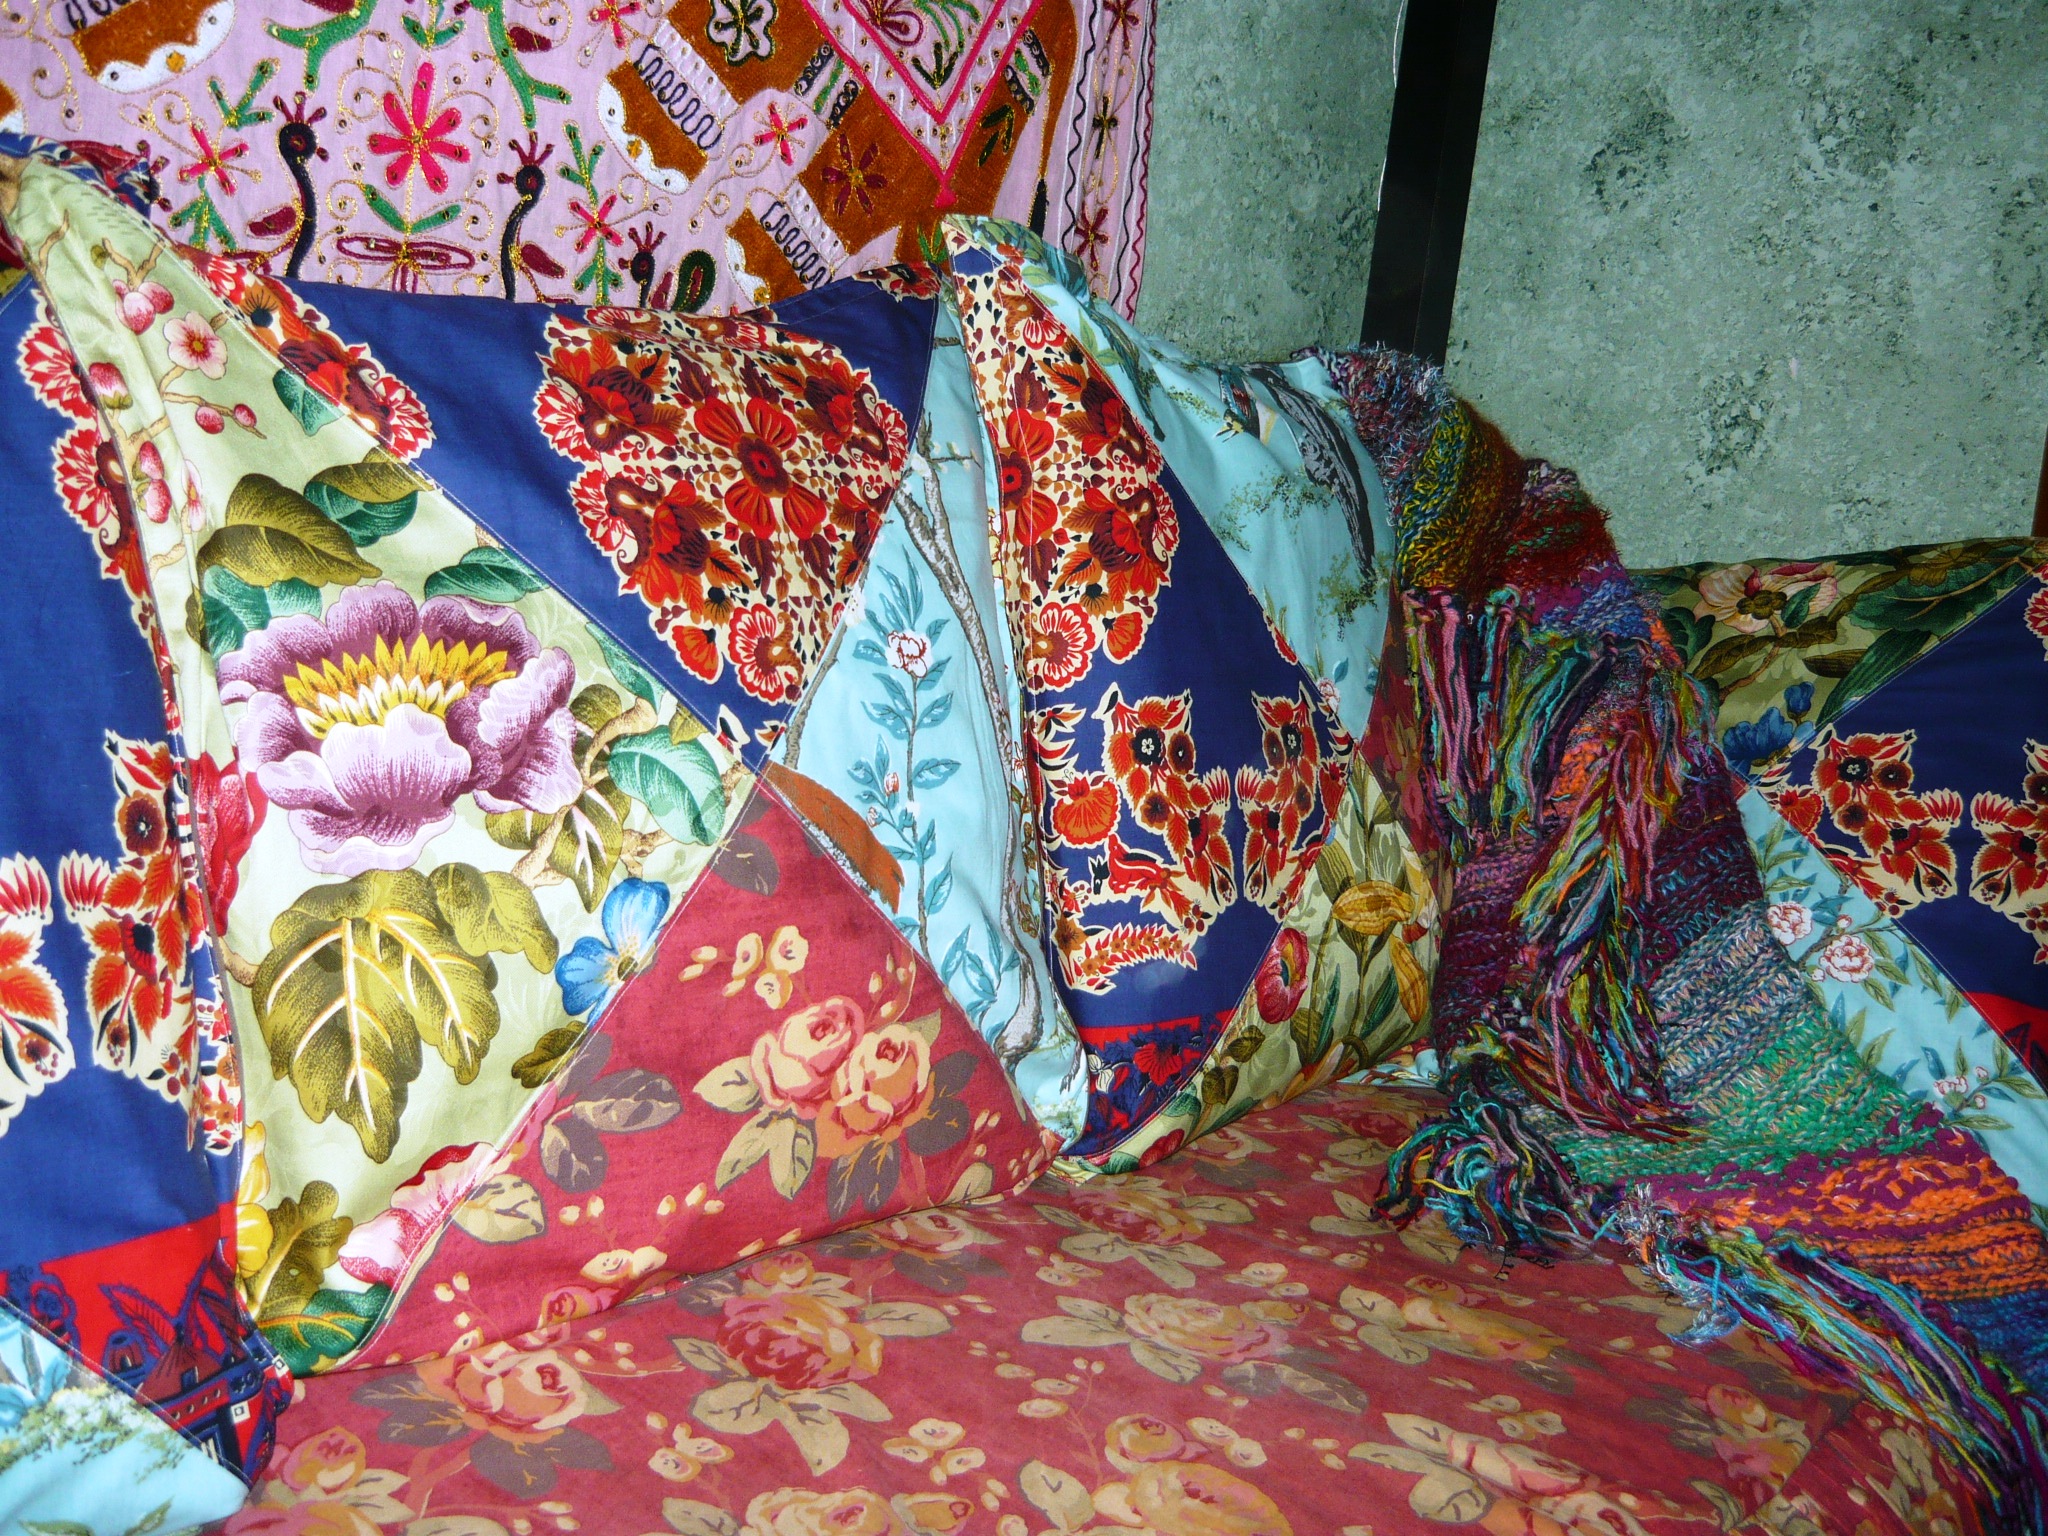
Just before Christmas, on one of our common Charity shop rambles, we came across some lovely fabrics. The first was a light green, American screen printed fabric from Braemore Design, the second a turquoise design with branches and birds from Design Edition Limited, 1981 and the third an unknown dark blue and red, Eastern European looking fabric. We got them for the bargain price of circa €1 each. The question was what to do with these as there was not enough of any one fabric for a large project. We are planning a sofa built into the wall in our extension and the choice fell upon using our lovely finds, to make large cushions for it. We already had some Laura Ashley rose printed fabric, a gift from a neighbour, that fit nicely into the design.

Patchwork has been used for hundreds of years to make use of smaller pieces of fabric and creating a beautiful whole. We decided to do a very simple version for our sofa cushions. Anyone with basic sewing skills can manage a project like this, and you can adjust it to suit your taste and requirements. Here follows a description of how we made ours, if you would like to give it a go.
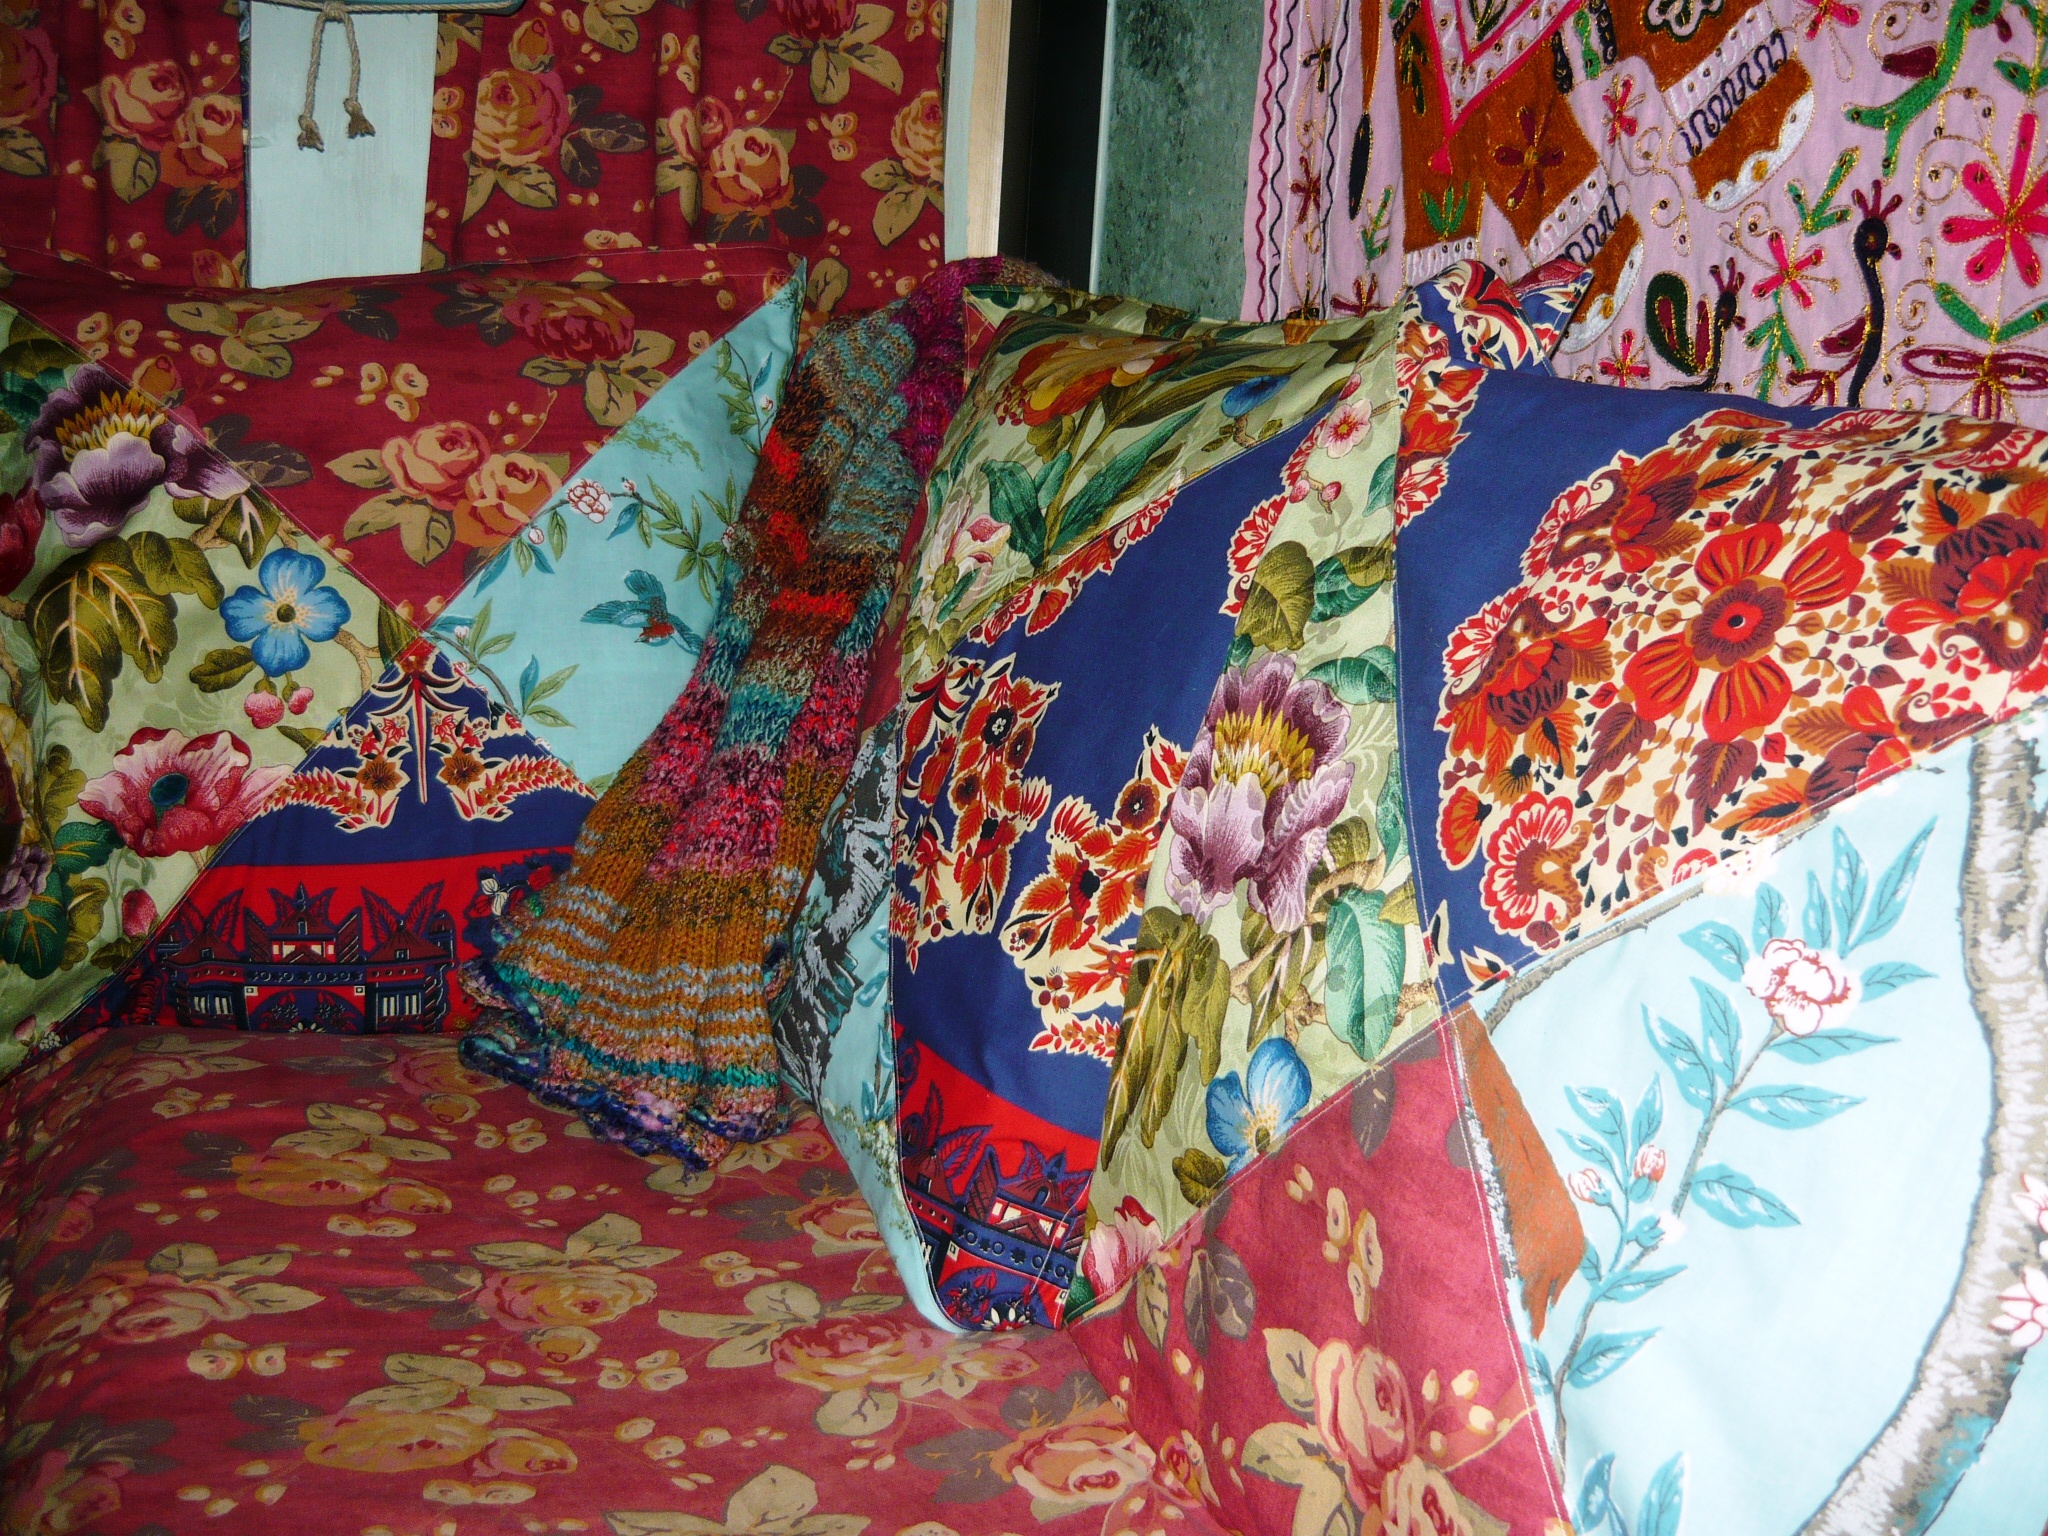
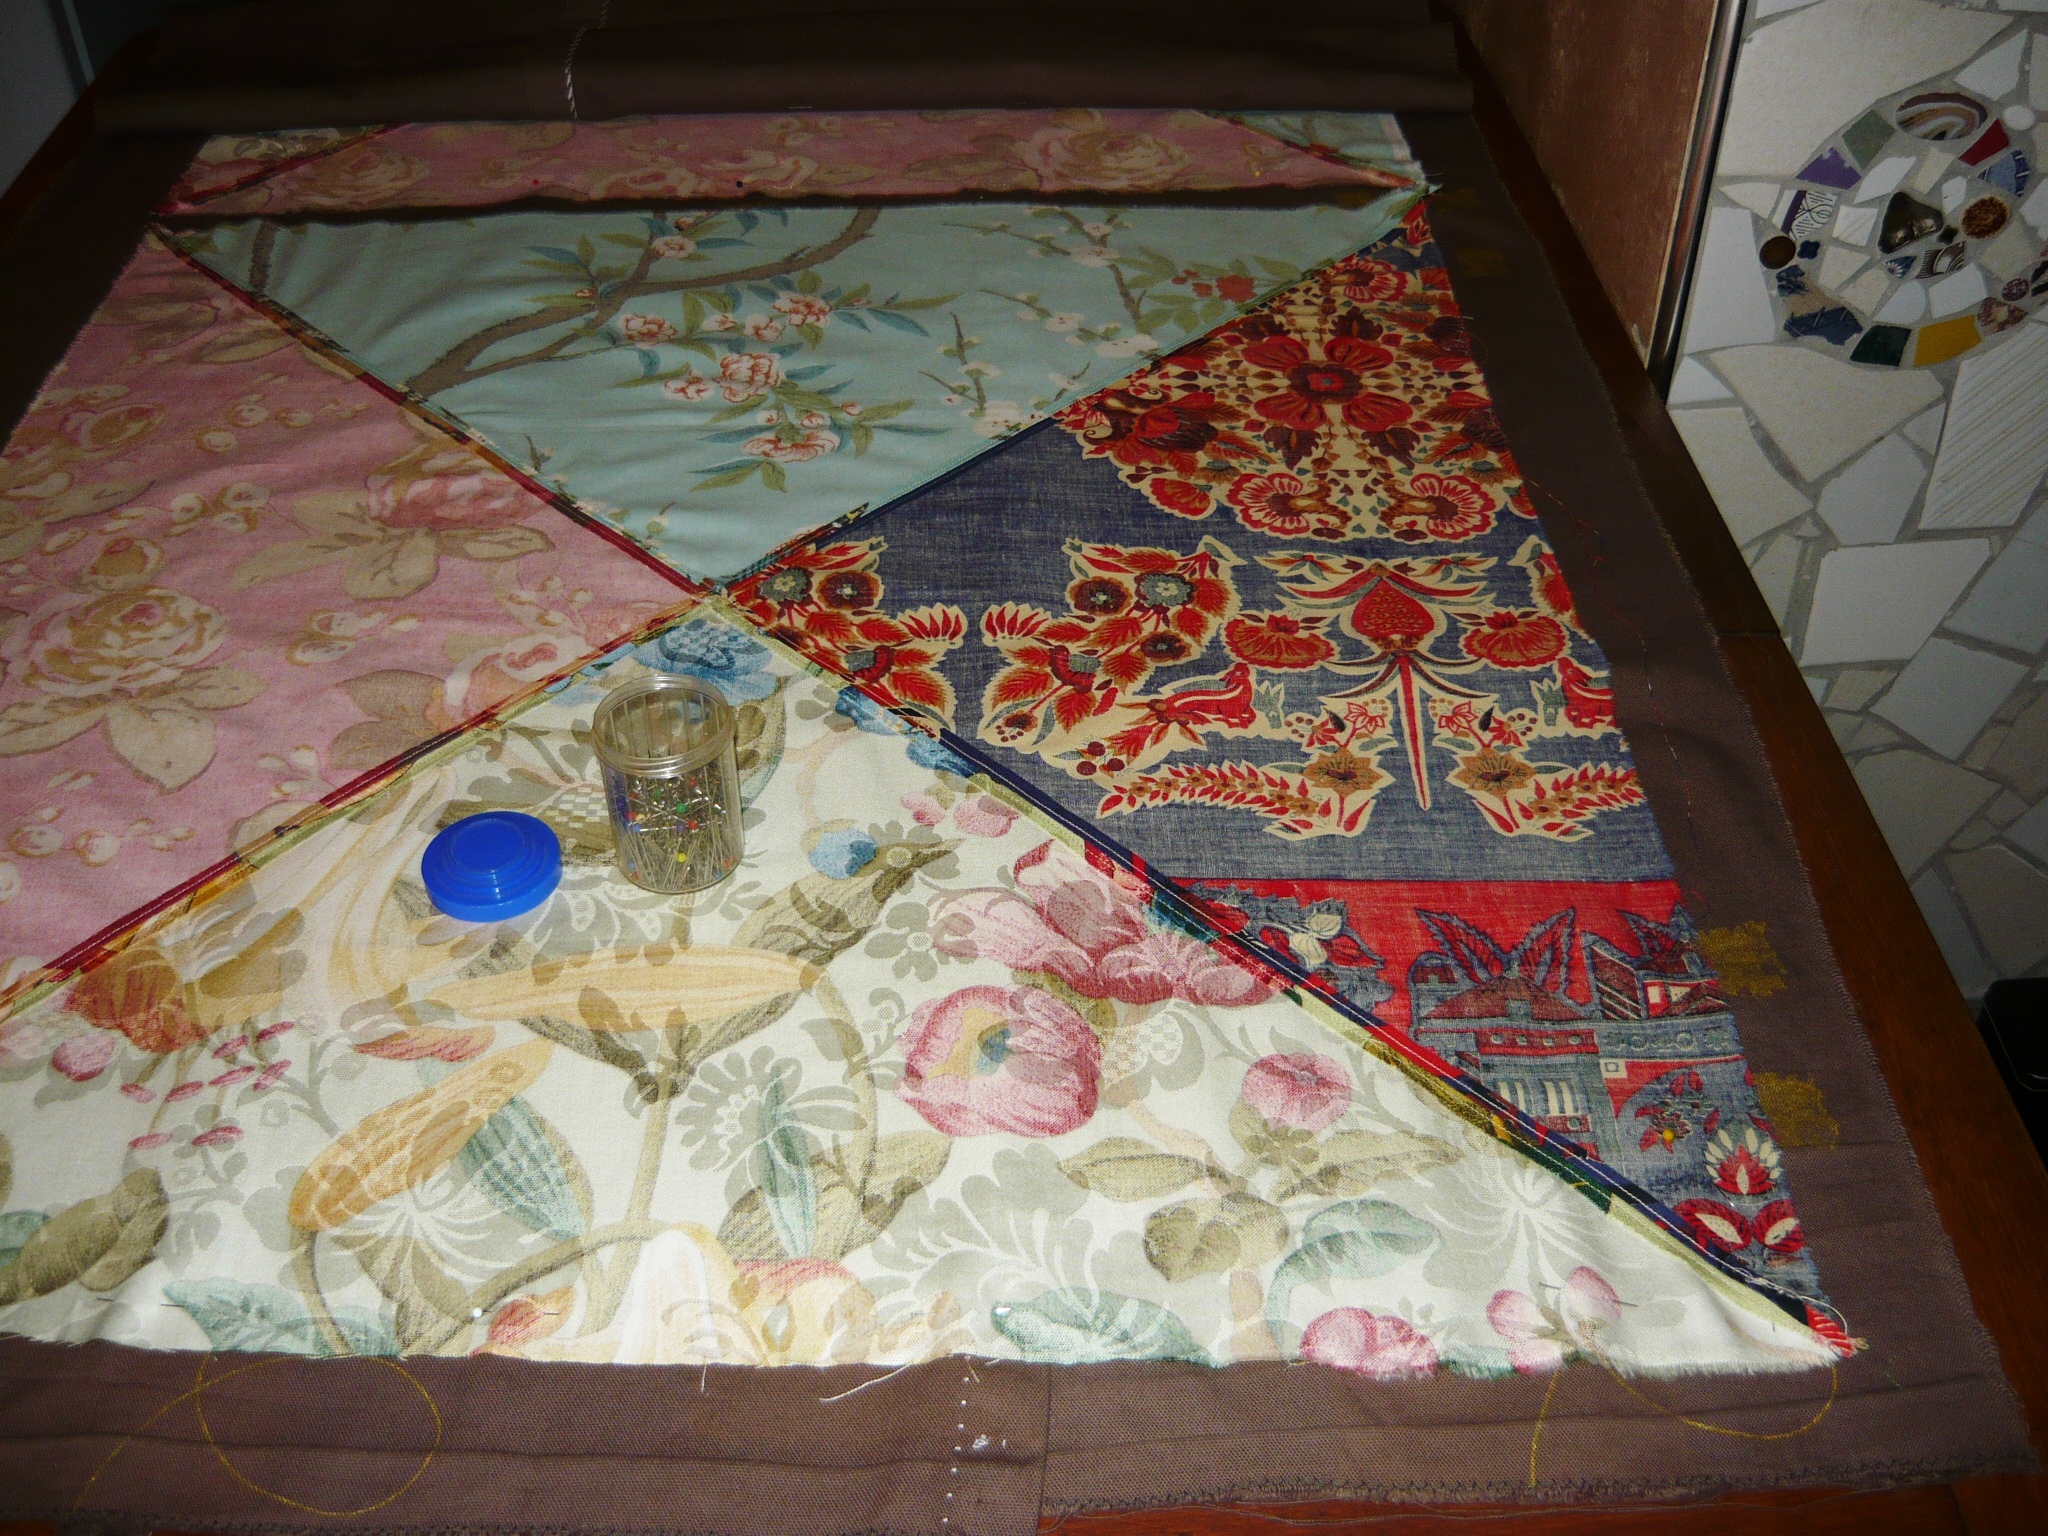
We used some 65x65cm inner cushions from IKEA, so the squares of fabric needed to start out as 75x75cm squares. We prefer tearing the fabric squares over cutting them, as it makes for perfect straight edges. Fold your fabric square into a triangle corner to corner and press the fold with your iron. Cut on the fold and fold the remaining triangles again, press and cut. You will end up with your square cut up in four equal triangles. For four cushions you need four different fabrics. If your fabrics have an up and down in the design, you might want to keep them all in the right direction on your finished cushions. Put them out in a line on the floor all in the same direction and take the top piece from your first square, the left piece from your second square, the bottom piece from your third square and the right piece from your forth square. Put the pieces together for your first cushion and move on to do the same thing again, but this time start with the left piece from your first square, the bottom piece from your second square and so on, until all the pieces are used up. Sew two pieces together, press the seams, sew the other two pieces together and finally sew the whole lot into a square. We pressed the seams from the back and sewed again, close to the seam. This makes for a decorative finish but also strengthens the covers and they can stand up to numerous washes.

We had some old curtains that would make great cushion backs, but they were white, not a wise choice with four teenagers in the house, so we dyed them in the washing machine into a neutral brown. We tore them down the middle and turned the pieces around, overlapping each other along the middle, to make a slit opening on the back of each cushion. Place your backing fabric facing right side up and the sewn squares on top, right side down. Pin and sew around the edge. Cut the corners close to the seam [see picture] and turn right side out. Press and stitch close to the edge and then again further in, to create a wing all around the edge.


Using fabrics in this way is very satisfying as you end up with a cohesive design when starting out with quite different individual pieces. Using old fabrics is economical, fun and good for the environment. We made 8 large cushion covers for a total of €13.50. In the pictures the covers are modeled on our sofa in our combined living and bedroom. We can’t wait until we have our extension finished and they can be moved into their intended place.

2 thoughts on “Cushions for pennies.”