Going around in circles

bathroom 019

The last month has seen some changes to our main garden circle. We have finished the work on the stone mowing strip all around the edge. Last year the grass grew into the stone wall at the front of the raised beds and it is very nice to have gotten rid of that problem. We are now also able to go around the circle with our push mower and cut the grass all the way to the edge without a problem. After the cement under the stones had set we added hypertufa to the cracks and brushed it in to set and kept watering it for four days, three times a day. This prevents the hypertufa from drying out too quickly. Hypertufa is a very versatile material to use in the garden. We make ours out of one part sand, one part cement and one part compost and a generous helping of PVA. The compost makes the dried mixture slightly porous and provides a few nutrients for mosses to grow. It can be used to create sculptures and planting troughs that look very natural after a while due to the moss.

 hypertufa

bathroom and rubarb 021

 North stone

We have also finished the second low fence to support the artichokes and cardoons. We made it out of willow and dogwood for all the woven pieces with Bamboo canes for the uprights. Hopefully it will be high enough to prevent the huge plants from blowing over. They grew to almost three meters last year.

 artichokes

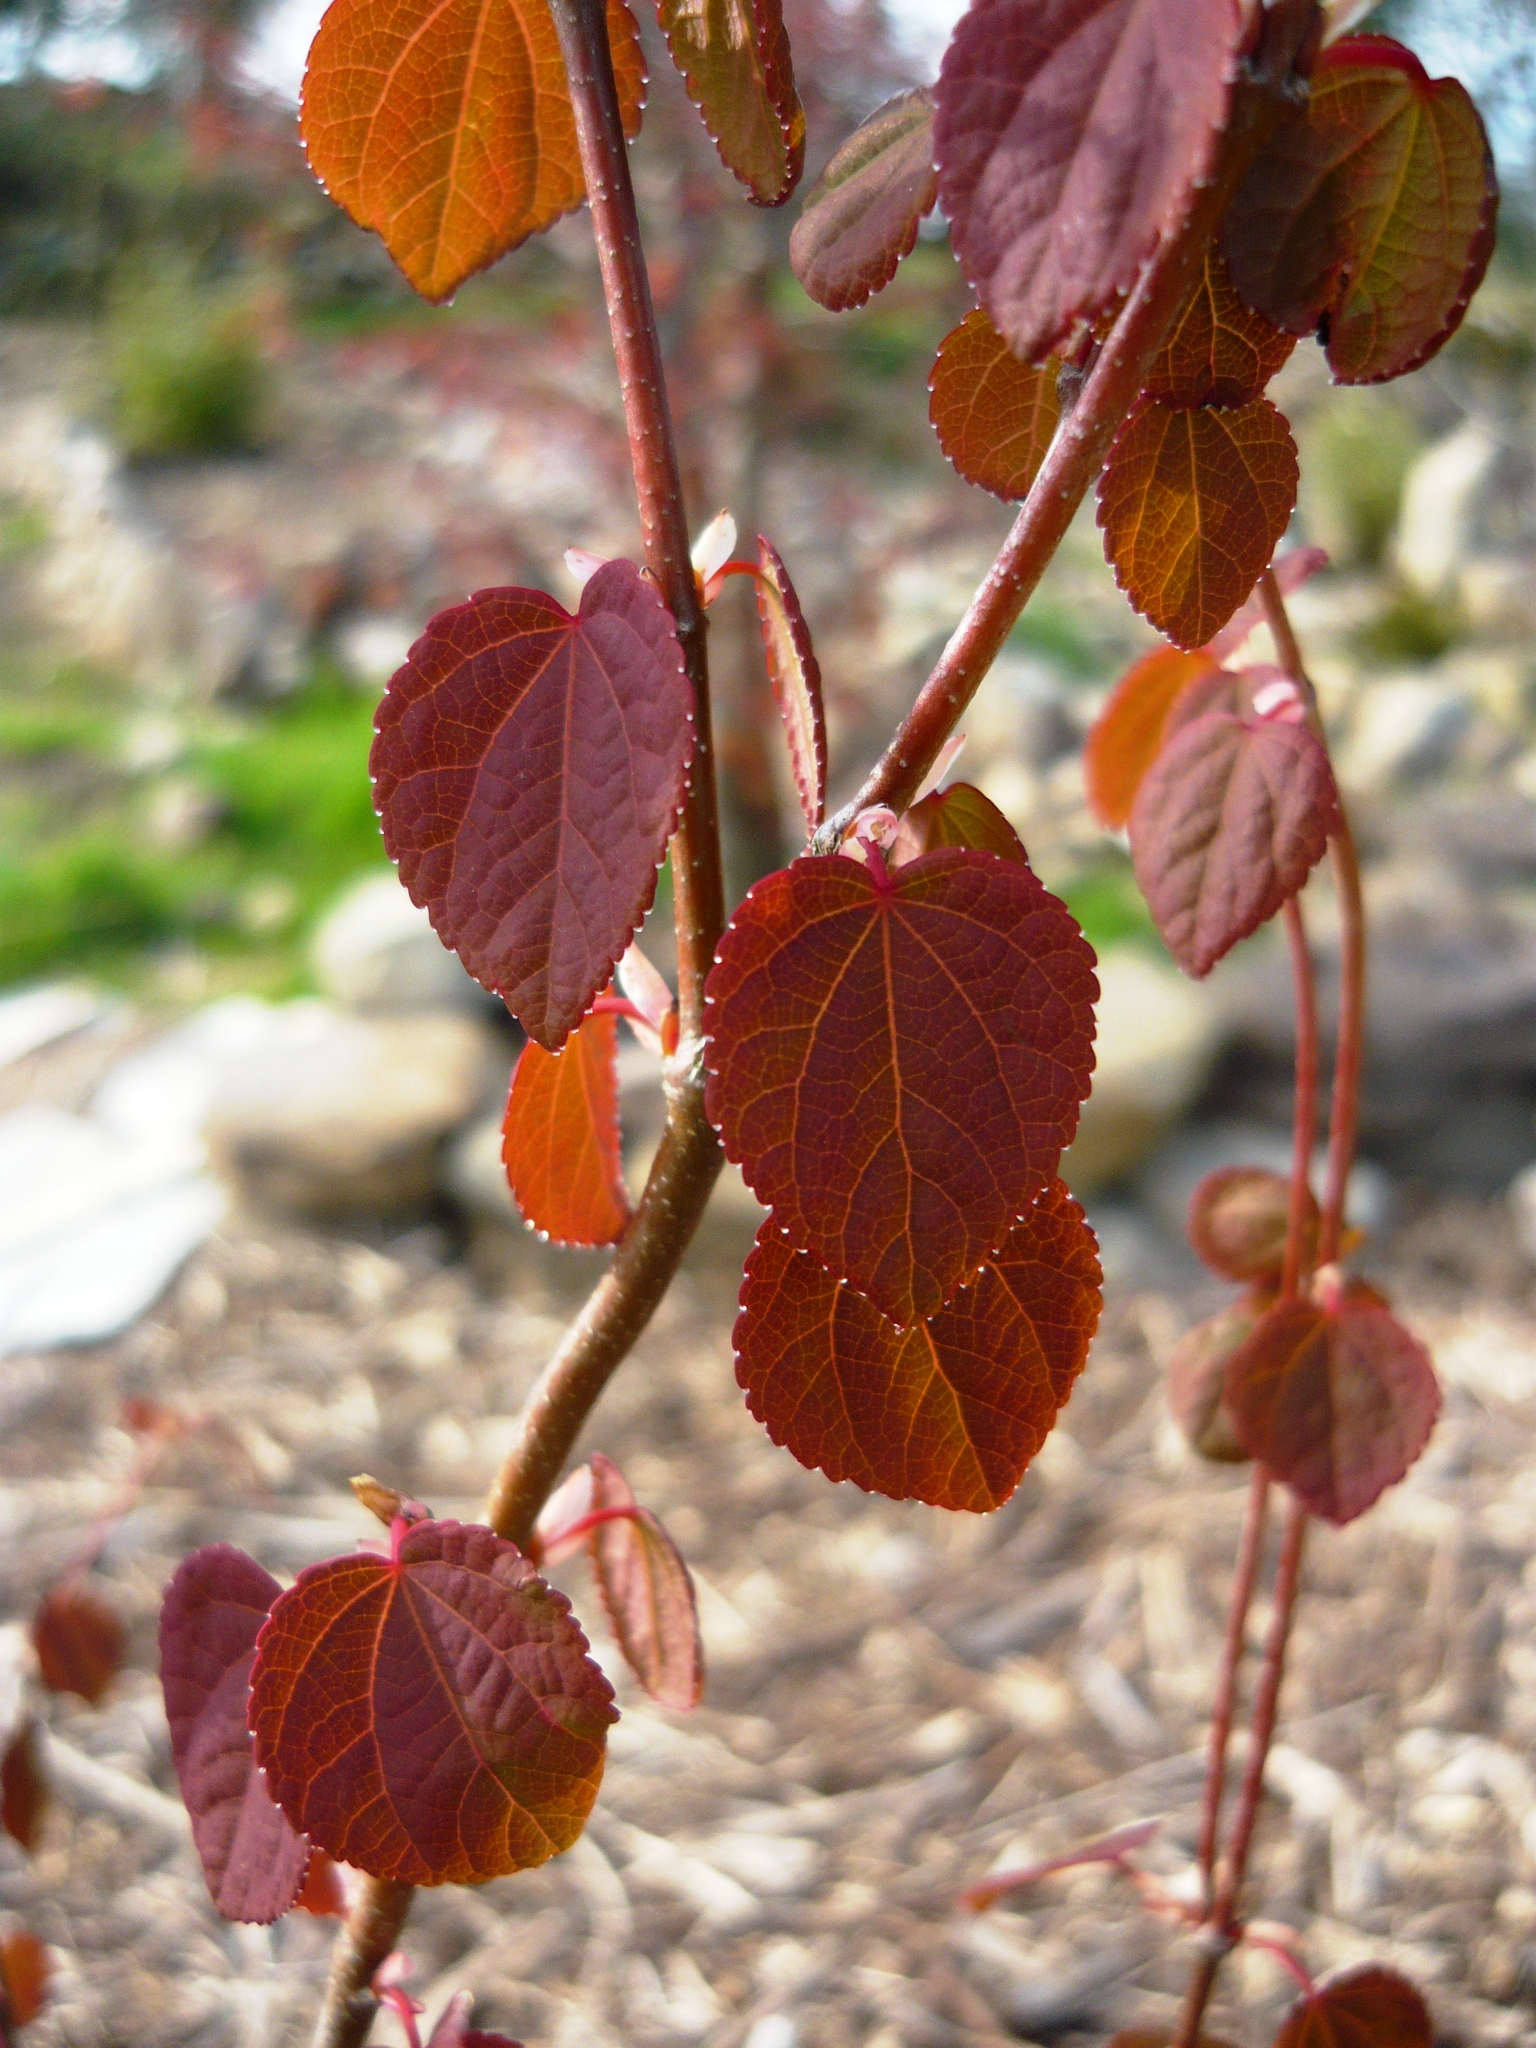
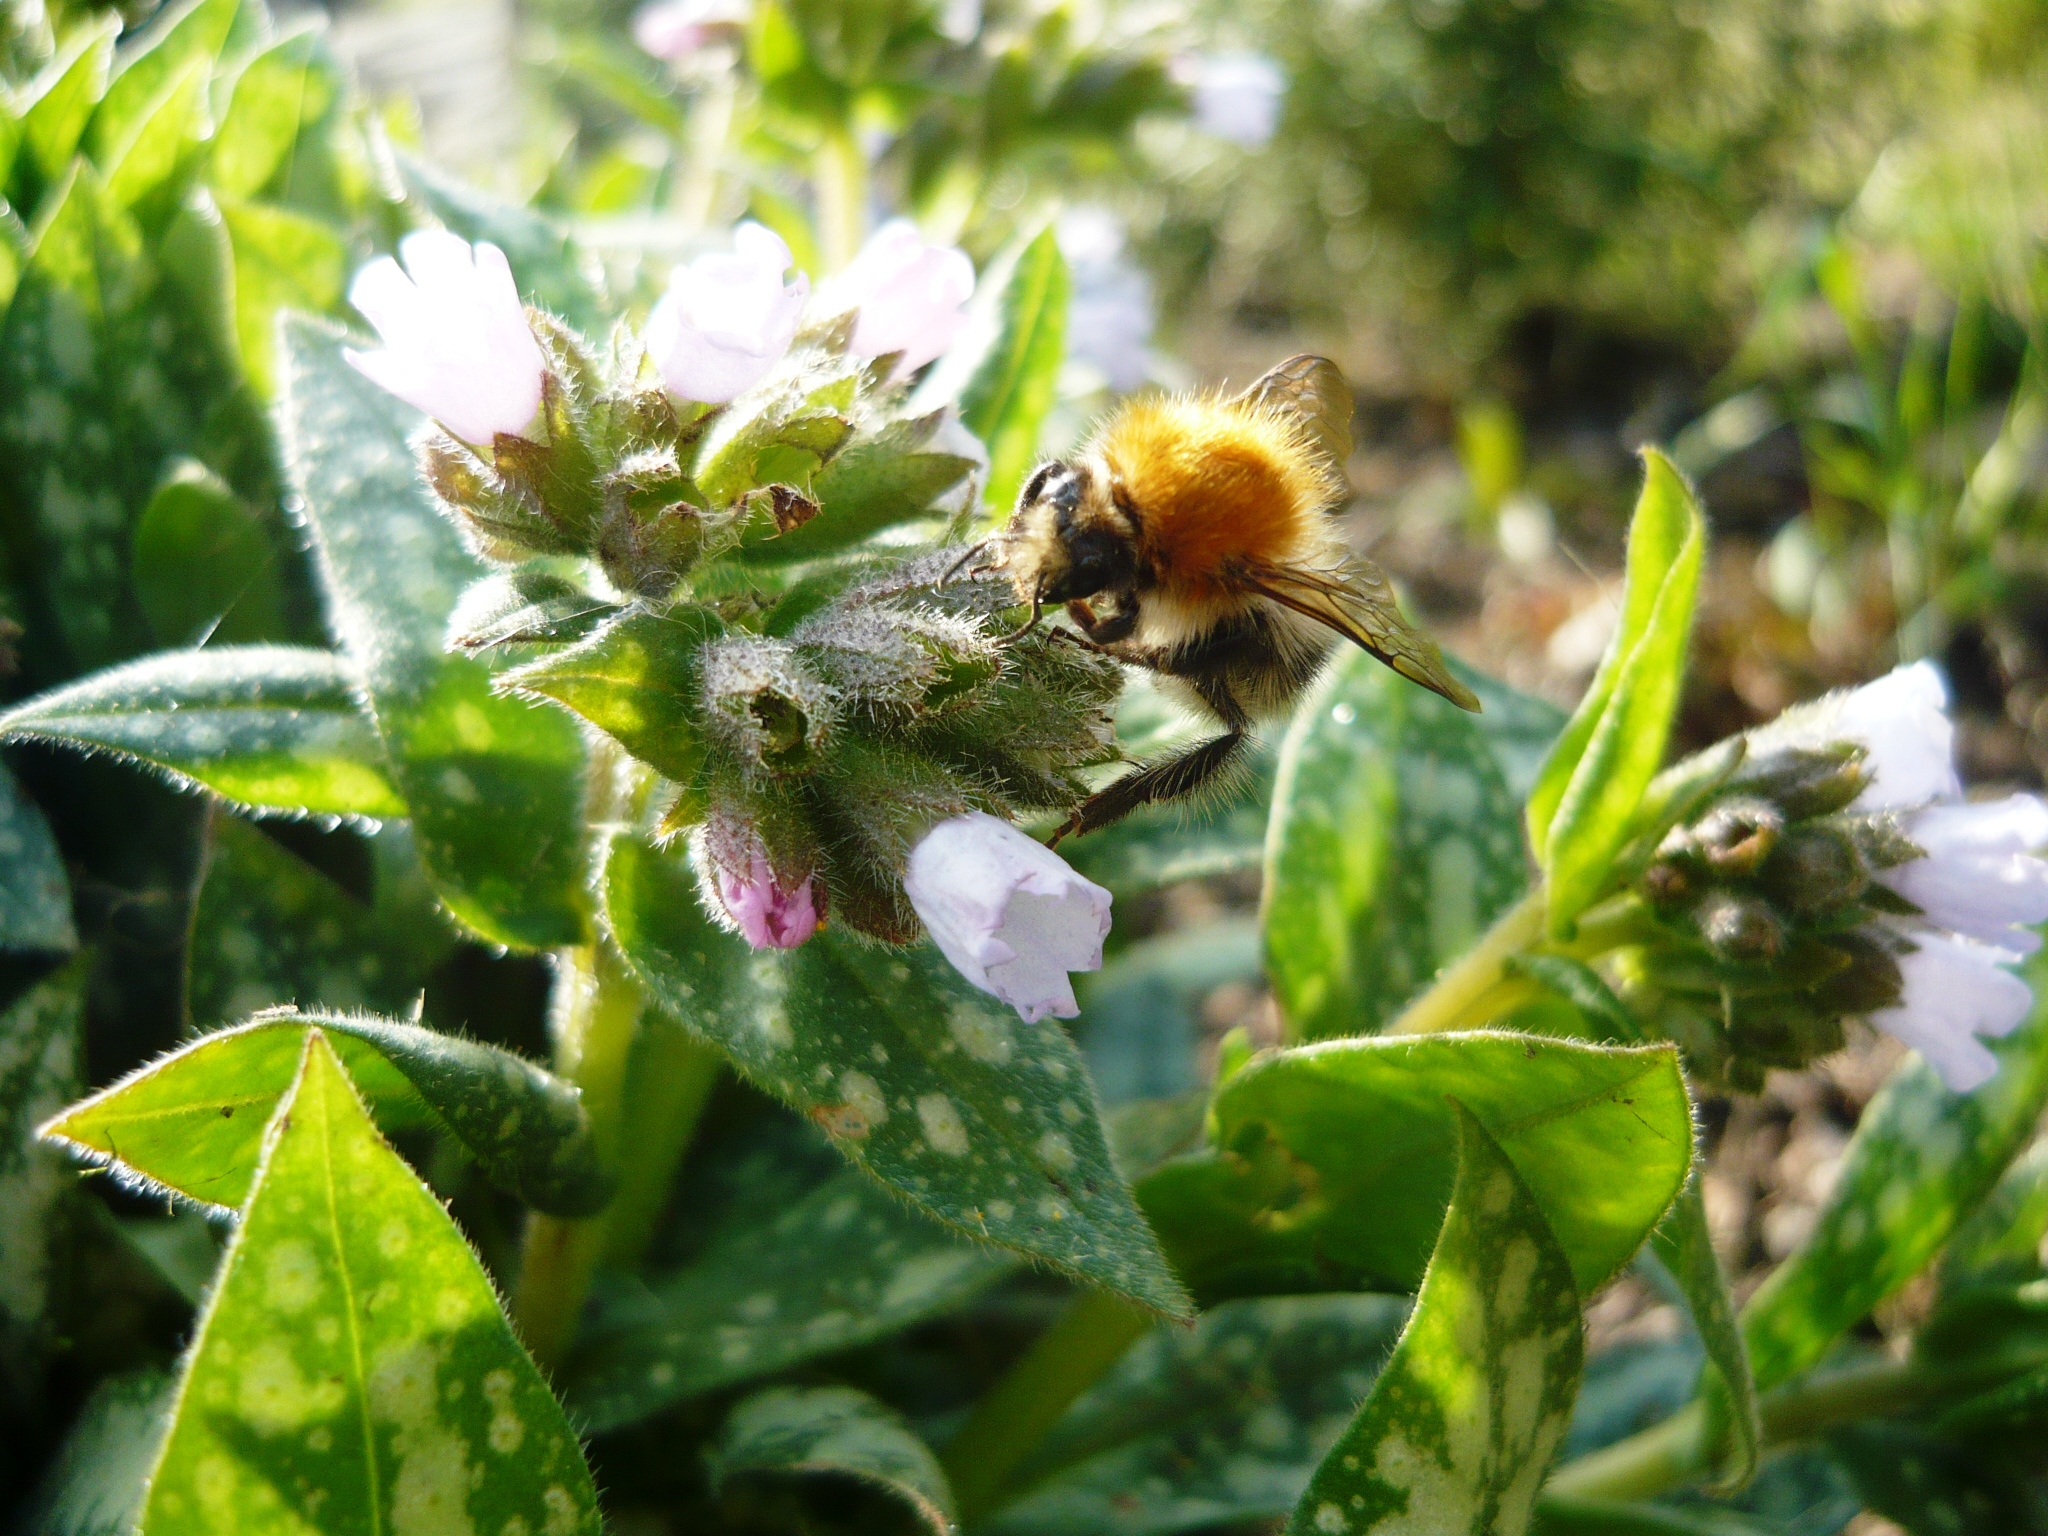
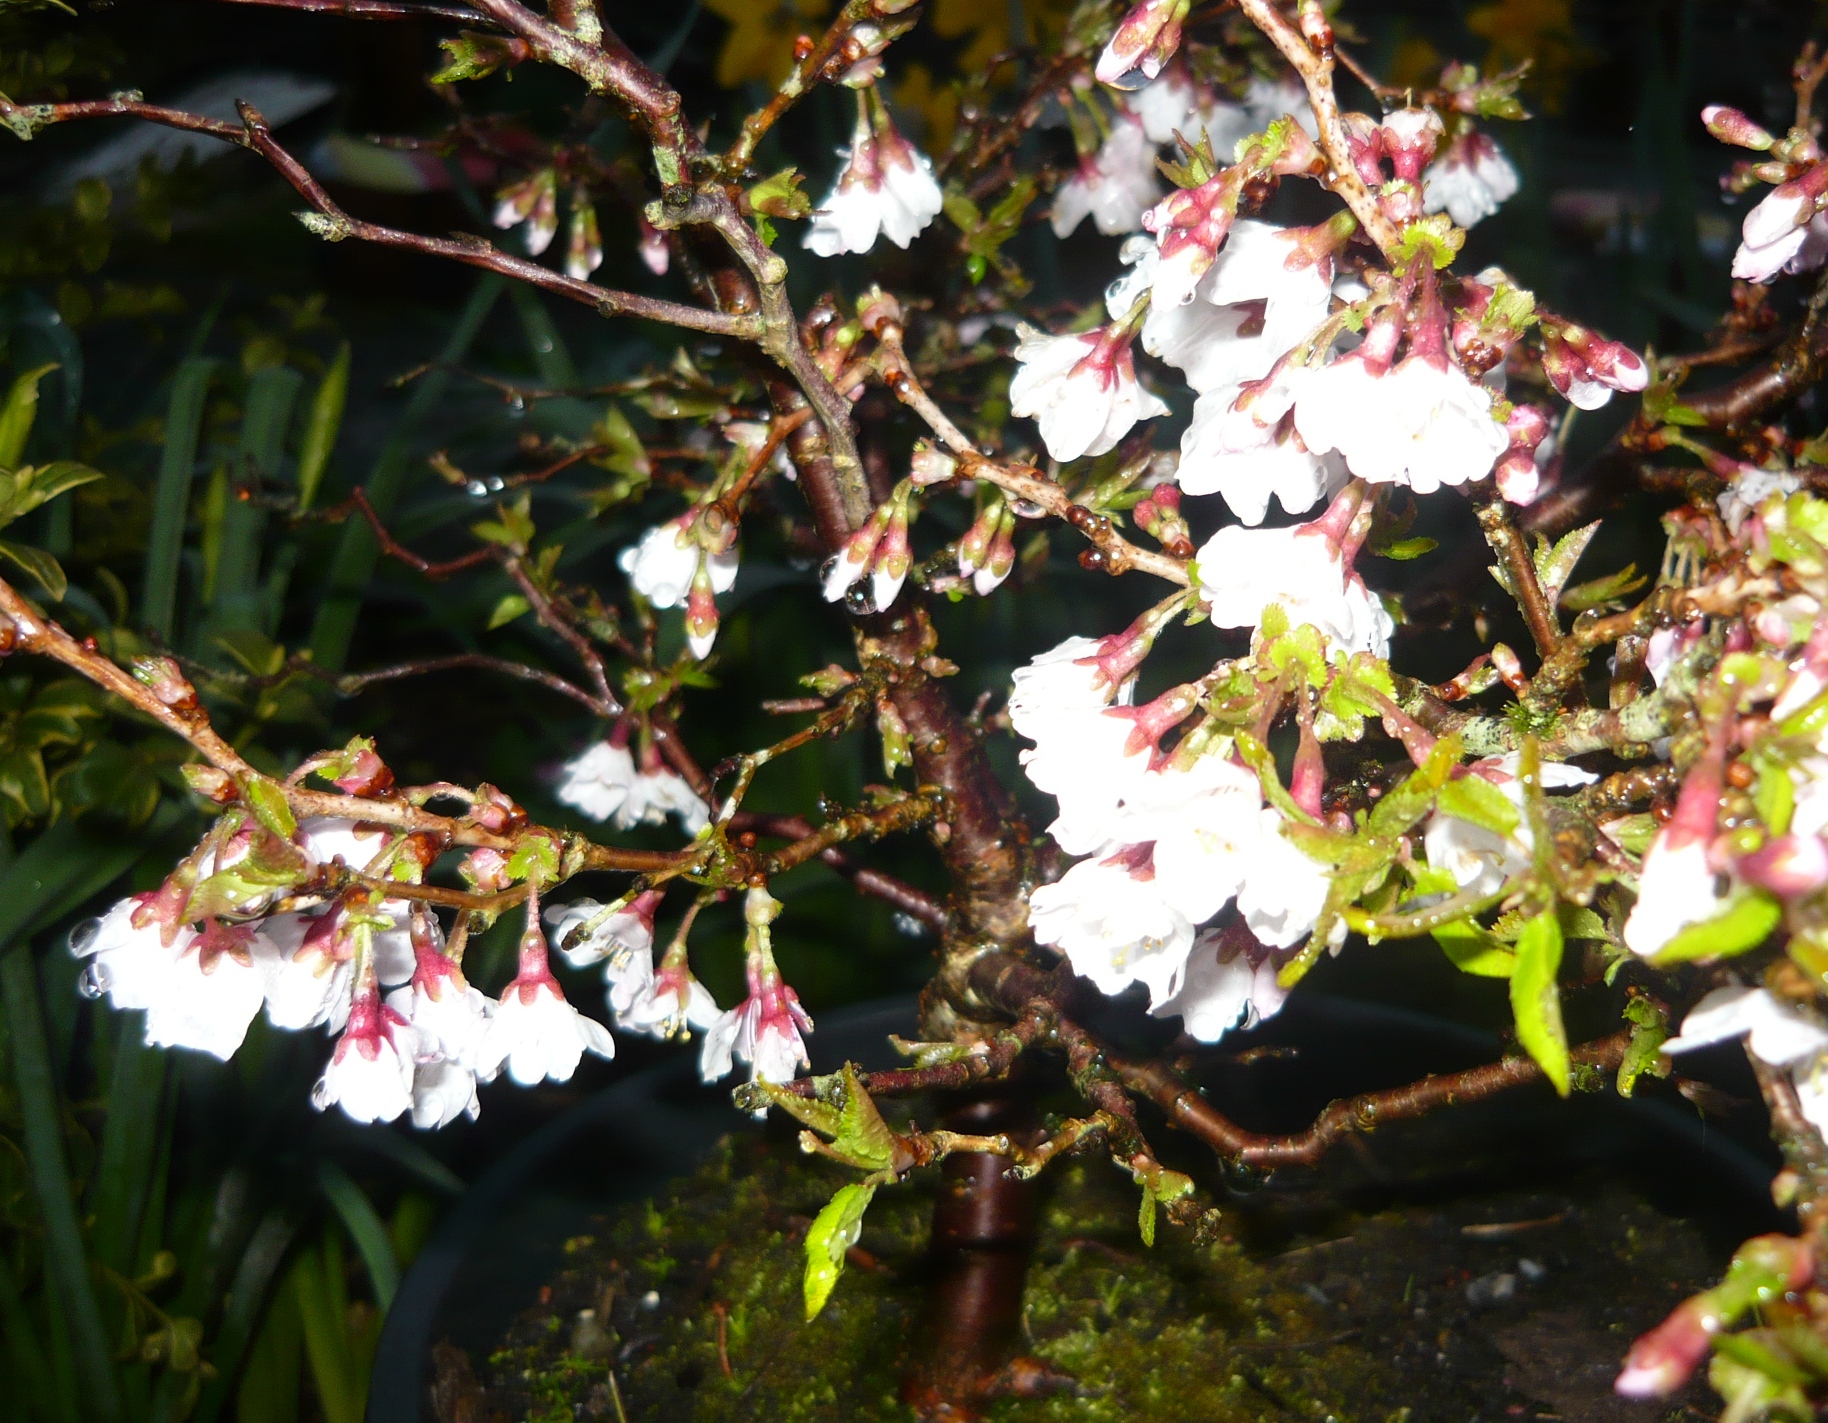
All our plants have grown a lot this month but there is still mostly greenery to be seen and not that many flowers. April has brought a lot of sunny warm days but also some frost and even hailstones.Our weeping birch has beautiful small leaves and the onion sets we planted in March are all growing nicely.The tree peony is about to flower and a lot of annual poppies have germinated from self sown seed last year. It is great to have some self seeding plants such as poppies, forget me not and aquilegias in the flower borders as you are always in for a surprise. We are keeping our dandelions all around the garden and do not try to eradicate them from the lawn as they are very important to the bee population and also nice to eat in salads.

circle

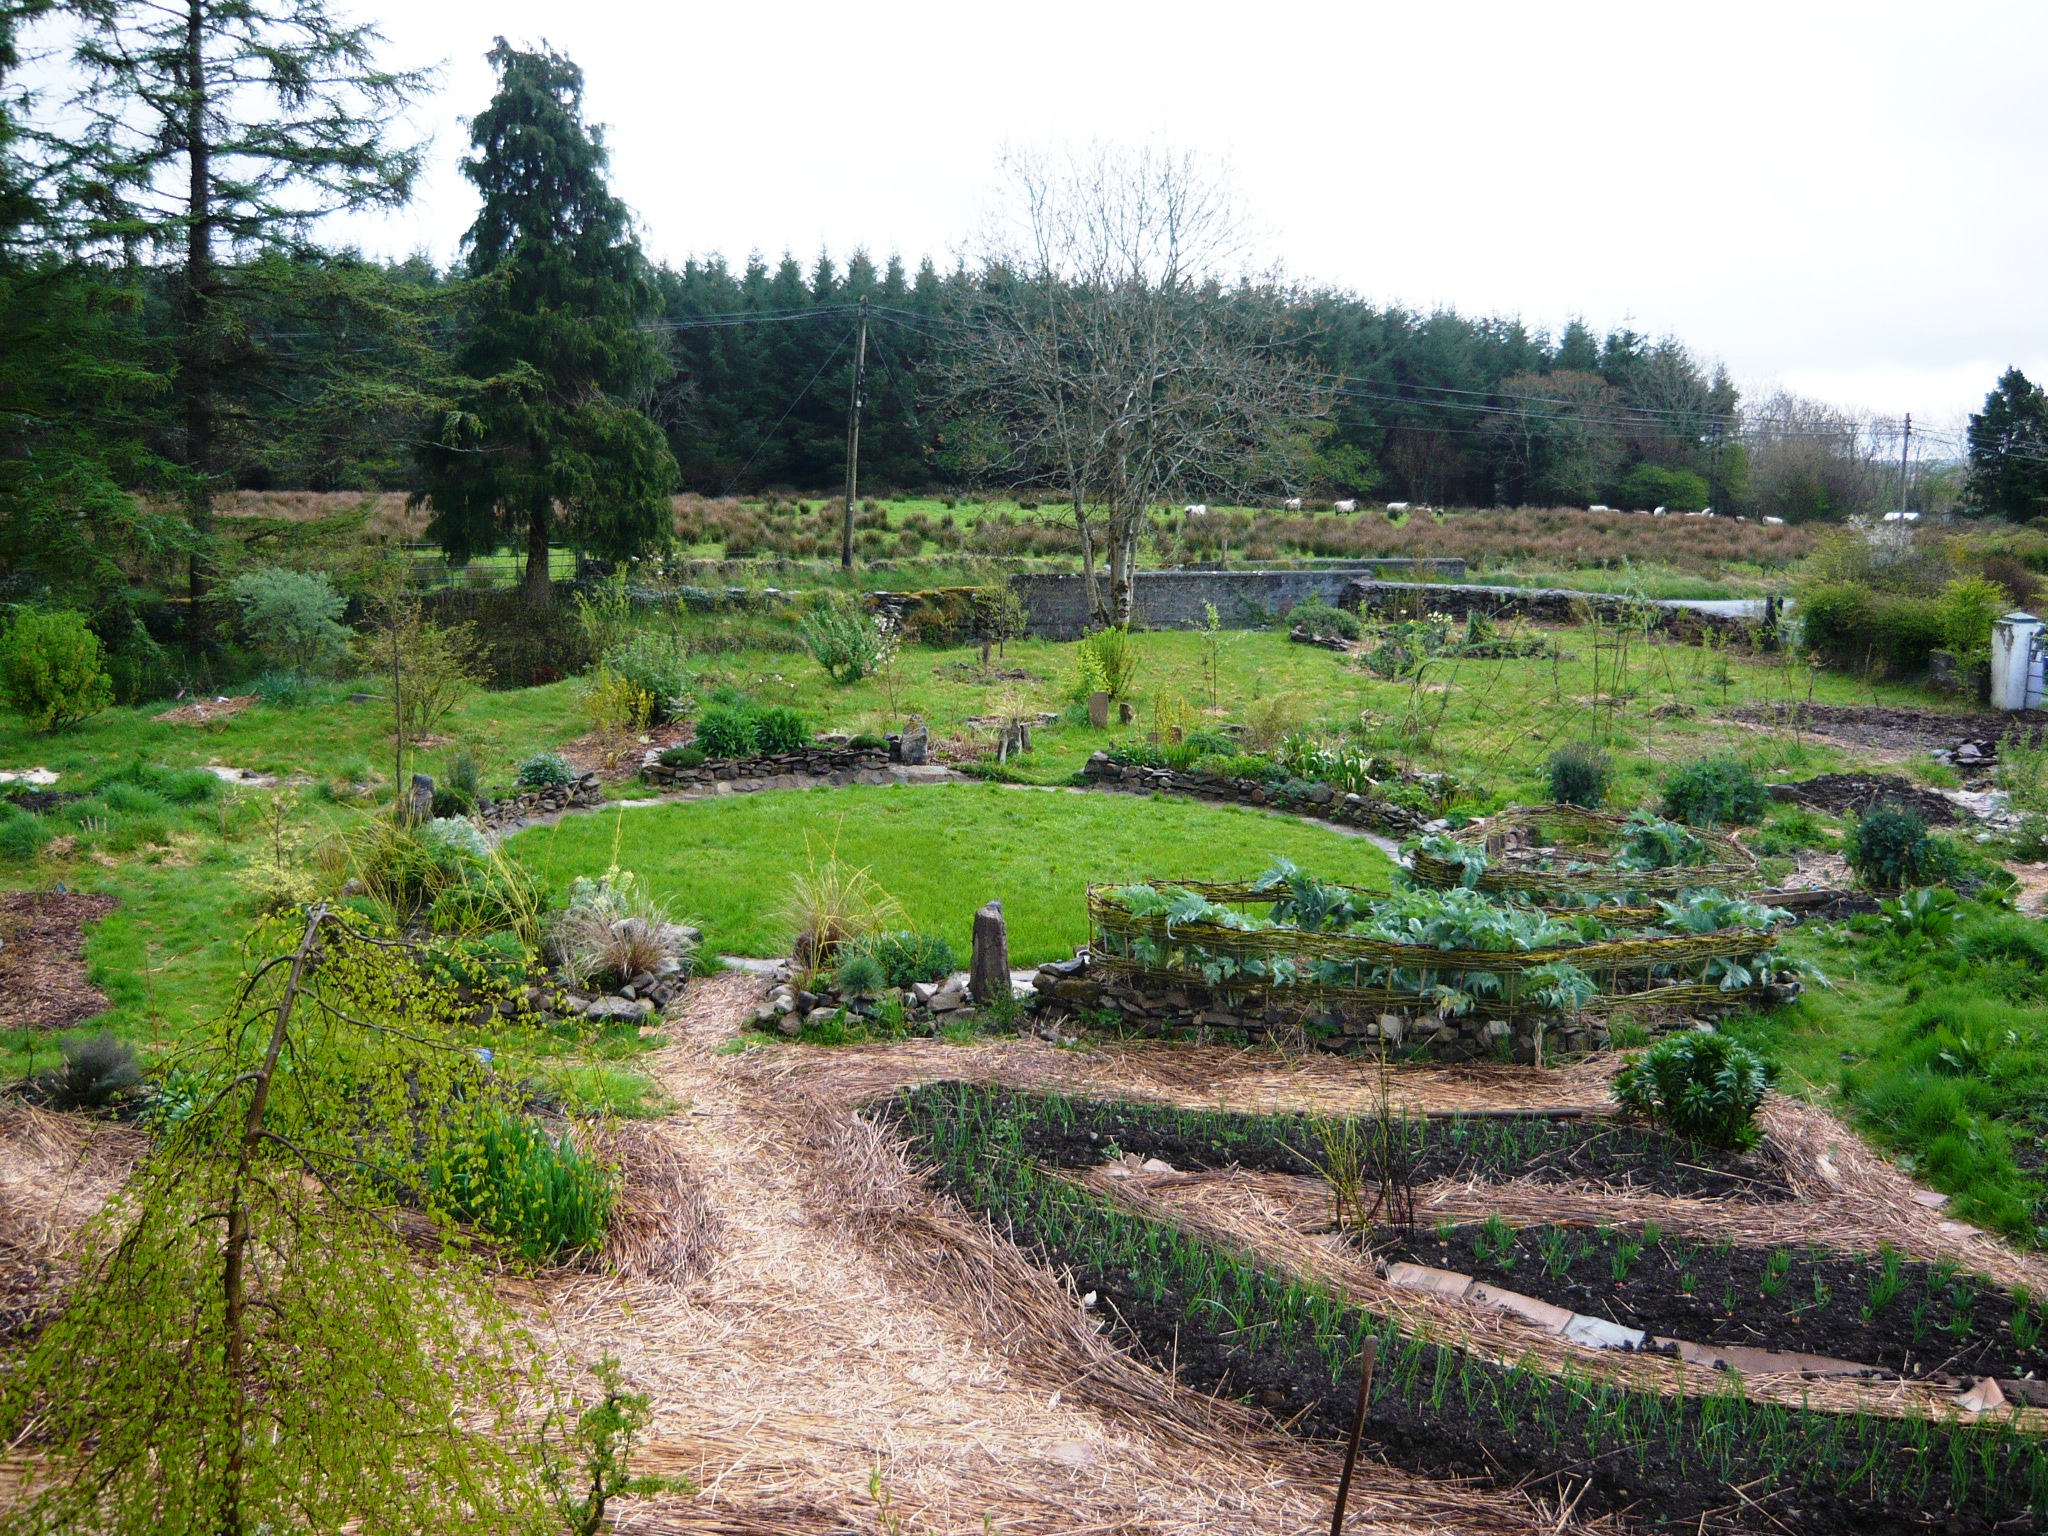
 Here you can see pictures of the circle towards the four points of the compass.

 east

East

south

South

west

West

North

North

We are taking the same pictures once a month to keep a record of the changes throughout the seasons and the years. All the posts containing these photos are collected in the category Elemental circle. As we are nearing the end of the month we are looking forward to the colorful floral explosion that is bound to happen in May. All over the garden there are thousands of buds, just about ready to burst open. We can’t wait to share next months pictures of our circle with you.

Light at the end of the bottles.

We have been hard at work for over a month and finally we are starting to see the results of our efforts. One of the main reasons for our bathroom renovation was to raise the ceiling. It was so low that an adult was unable to stand up in the bath to take a shower. It always had a slightly claustrophobic feel to it. So the old leaking, low roof had to go.

 No roof

Along with a raised ceiling we wanted more light and our choice fell on a wall made out of old wine bottles and jars. Recycled glass is an environmentally friendly, free, beautiful resource. It is easy to come by and easy to use. What is not to like about it. We drank the odd bottle of wine, collected bottles from friends and ate a lot of pasta sauce and mayonnaise for a while. The walls in our bathroom are very thick so we only needed to pop a jar on top of each bottle and tape to secure. It is good to have a similar height to your glass bottle bricks as it makes the building a lot easier. You will need to play around with the different bottles and jars to get them to an equal height.  Make sure all bottles are clean and dry before taping them together.

bottles

After removing all the layers of the old ceiling and roof, we built up next to the window and on each corner with cement blocks that could easily take the weight of the new roof and filled in the sections in between with our made up bottle- bricks.

blocks

bathroom blocks

To save on cement we put insulation on the middle of the block in the same way we did on our bottle wall in our extension. You can read about all our construction techniques in the building category. The bottle bricks acts as double glazing in themselves so makes for a very well insulated wall.

bathroom bottles

over window

We filled in between the bottles with cement and smoothed it out on the inside and out. After that all that we needed to do was put on a 50/50 mix of PVA and emulsion for two layers followed by two layers of emulsion. We went for white and added some sand to the paint in the ceiling to get a similar look to the bottle sections and the ceiling. We added mosaics to the pillars and are very happy with the results. The result is a bright, personal and very cheap bathroom. About 80% of our tiles came from a skip so the main cost for our walls was for the few concrete blocks, cement, the tile adhesive and grout. But the best feeling comes from knowing we have impacted as little as possible on the environment by using mainly bottles and other recycled materials. It takes more time than tiling and building in a conventional way, but if you decide to do something similar, we think you will be very happy with the results. Please post pictures in the comments if you make something inspired by this post. We would love to see it.

bathroom

bathroom painting

bath bottle

bath bottle 015

bath bottle 007

Wonderful distractions in spring

 tulip

We are hard at work putting the finishing touches to our complete bathroom renovation. We will soon write a couple of posts here about it so you can see our new mosaics, our living roof and bottle walls. Maybe it was unwise to choose to do this renovation at this time of year as the garden is a constant distraction. It is not easy to toil away for hours attaching tiny tiles to a design or smoothing cement around the bottles in the wall when all the joys of spring are right on our doorstep. When we tore ourselves away from the work for a few precious moments today we managed to spot the first peacock butterfly, the first swallow and the first newt of the year as well as all the beautiful colours, shapes and wonders in the following images.  We are happy to be at the finishing stages of our renovations as we will be able to spend some more time in the garden soon, where even weeding is a happy task at this time of year.

Katsura tree

Katsura tree

Claddagh

Irish primrose Claddagh

Japanese maple

Japanese acer orange dream

Larch

Larch

Pieris

Pieris forest flame

Amelanchier

Amelanchier Canadensis

pulmonaria

Pulmonaria Lungwort

bog garden

Bog garden

broccoli

Purple sprouting broccoli

pear

Pear blossom

berries

Berries to be

For the love of Rhubarb

Timperly early

What plant is more beautiful and versatile than rhubarb? We grow five different varieties in our garden. One of the firsts plants in spring to make an appearance and also one of the first to harvest. We grow several traditional garden rhubarb for eating as well as two varieties often described as ornamental, although they have great medicinal and culinary values as well.

rhubarb bud

Rheum Palmatum, sometimes called Chinese or Turkish rhubarb have been used for millennia to treat a range of conditions and health problems. The name derives from the shape of the leaves, rather like a hand with fingers outstretched. The root is the most powerful part of this plant. The leaves, as all rhubarb leaves are poisonous. Our Palmatums are two years old now and are really starting to settle in. The leaves can grow very big, close to a metre across and the whole plant can grow to around three meters. It is very ornamental and looks great close to our wildlife pond. We put it into slightly boggy ground and built a small mound for each plant and they seem to like those conditions very much. Every year we put on well rotted manure and some straw for mulch. All rhubarbs also benefit from having their cut-off leaves put down around the plant as mulch that slowly rots and nourishes and protects the crown. When we planned our garden we wanted to put in some Gunnera but as one variety of this is liking Irish conditions a bit too well and has become a problem and is very difficult to eradicate, we did not want to risk planting any varieties of this beautiful plant. We did a bit of research and read about Rheum Palmatum and now we could not be happier with our choice. It is a magnificent plant in every way, even more beautiful than the Gunnera.

rheum palmatum

r palmatum

Rheum Australe, Himalayan rhubarb is very pretty with rounded reddish leaves. We only planted ours last year so they are still small. We are looking forward to see how big they will get this year.

australe leaf

rheum australe

Our eating rhubarbs are Timperly early, Victoria and a lovely unknown variety we were given by a friend. We like using our rhubarb for pies, cordials, chutneys and simply stewed.  When harvesting it is important to pull the stems and twist slightly as cutting the stems with a knife leaves a stump that can rot and damage the crown. We love using other flavours to enhance the rhubarb.  For pies and cordials try strawberries as combined with the rhubarb it is simply delicious. The cordial, especially turns out lovely like this and is a good alternative to most shop-bought versions, full of additives and artificial sweeteners.  For stewing, jam and chutney try grated fresh ginger for a nice zing. Vanilla and almond also work well. Try making a sponge cake with vanilla and scatter it with chopped rhubarb and slivered almonds before baking.

stalks

rhubarb and pond

green leaf

Other good uses for rhubarb are as shady hiding places for all our frogs and toads and for making leaf concrete casts. We will give it a go in the summer when the leaves are nice and big. Rhubarb is such a beautiful and useful plant. We think every garden should have at least one.

bud red

pond rhubarb

As plants and slugs emerge.

cake and slugs 076

Our garden plants are slowly waking up after the long winter and unfortunately, so are the slugs. We do not wish to use any chemicals in our garden and as every gardener knows this can be a challenge when it comes to dealing with slugs. We have created two wildlife ponds and now we have a lot of frogs and newts in the garden and they thankfully eat a lot of slugs.

 cake and slugs 099

Another strategy we have found very satisfying are putting out thin slices of slightly overripe melon around the garden. The slugs cannot resist this and gladly abandon our small seedlings to feast on the melon. We then come along with a scissors and cut them in half. This might seem cruel but at least the slugs die instantly and do not suffer as they would if slug-pellets or salt were used on them. We have a huge number of slugs in the garden, and last spring we cut between 300 to 700 slugs every night and if we had not done that we would have had very few flowers and vegetables left. As our wildlife population has increased a lot over the year we hope it will be a better balance in the garden this year with more slug predators present.

Our Ligularias seem to be a firm favourite and last year they did not grow very well due to massive slug damage in the spring. We have done some research over winter and have now come up with a very satisfying solution to this problem. We use a combination of sheep’s wool and crushed eggshells. The sheep’s wool we use straight from the sheep and it has not been washed. We save all our eggshells in a dish on the kitchen counter. When it is full we roast them in the oven until they start to smell a bit burnt. We then crush them up finely and keep them in a big bucket in the shed.  Last year we used them around plants but the results were disappointing and a lot of slugs seemed to get across them. But this year we are very happy with the results. The combination of fluffed up sheep’s wool weighted down by a layer of eggshells has now been applied for a few weeks and the plants have suffered no damage at all in this period. As a bonus the wool will rot down over the year and fertilise the plant. We are planning to use this on our Hostas as well as any other plant that might come under attack. It is a very cheap and wildlife friendly way to deal with the slugs.

 ligularia

Ligularia desdemona

Ligularia pond

Spring is truly on its way here in the West of Ireland and we would like to share a few pictures here of our signs of spring along with a very welcome guest…

Forsythia

Forsythia

Cherry blossom

Cherry blossom

Hellebore

Hellebore

Daffodils

Daffodils

purple broccoli

Purple sprouting broccoli

Bumblebee

And last but not least, our first bumblebee of the year.