Fifty shades of Green.

 Sprouts close up

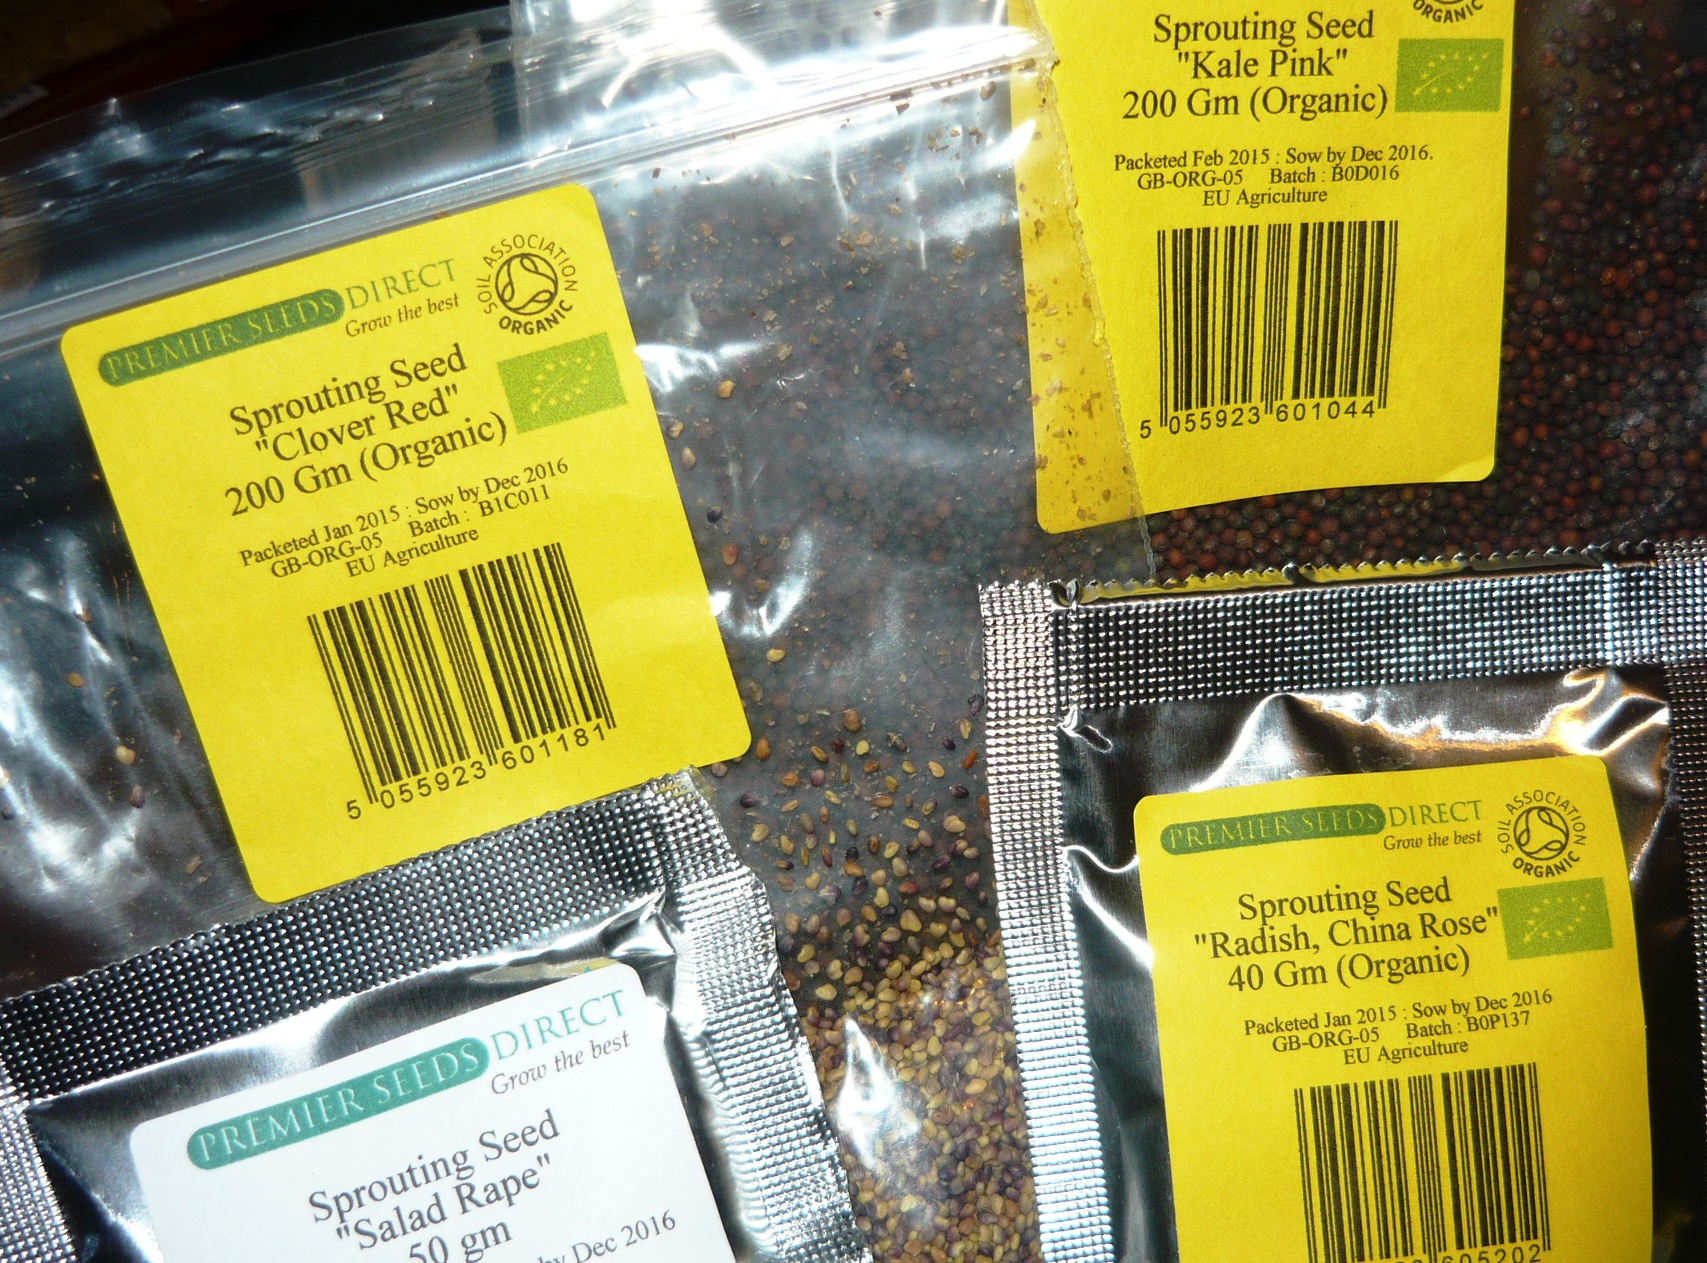
You do not need a garden to produce your own tasty greens and salad ingredients. We love sprouting. We can highly recommend it even if you do have a garden. It is so satisfying to have fresh, tasty and nutritious food growing in just days, right in your kitchen. It does not cost a lot to get started, for example, you can buy lots and lots of sprouting seeds for the price of a couple of cinema tickets. So instead of watching some film you might find boring, disappointing and degrading, you can have a lot of fun in your own kitchen.

seed packets

All the goodness of the plant is right there in the seeds. When you sprout them or grow them as micro greens, the concentration of nutrients and vitamins is much higher than if you grow them on to full size vegetables.

Sprouting seeds.

Our favourite way to grow sprouts is in a hemp fabric bag, hung over the sink. The hemp is antibacterial and does not easily get mouldy from being constantly damp. Our favourite seed to sprout is the humble lentil. Brown and Green lentils get completely transformed in just a few days from dry and hard to incredibly tasty, juicy and crunchy. We use them raw in salads and cooked in stir-fries and soups. If you buy a large bag of lentils, you will have many, many tasty meals for next to nothing. Any other slightly larger seed is also suitable for sprouting in a bag.

Sprout bag

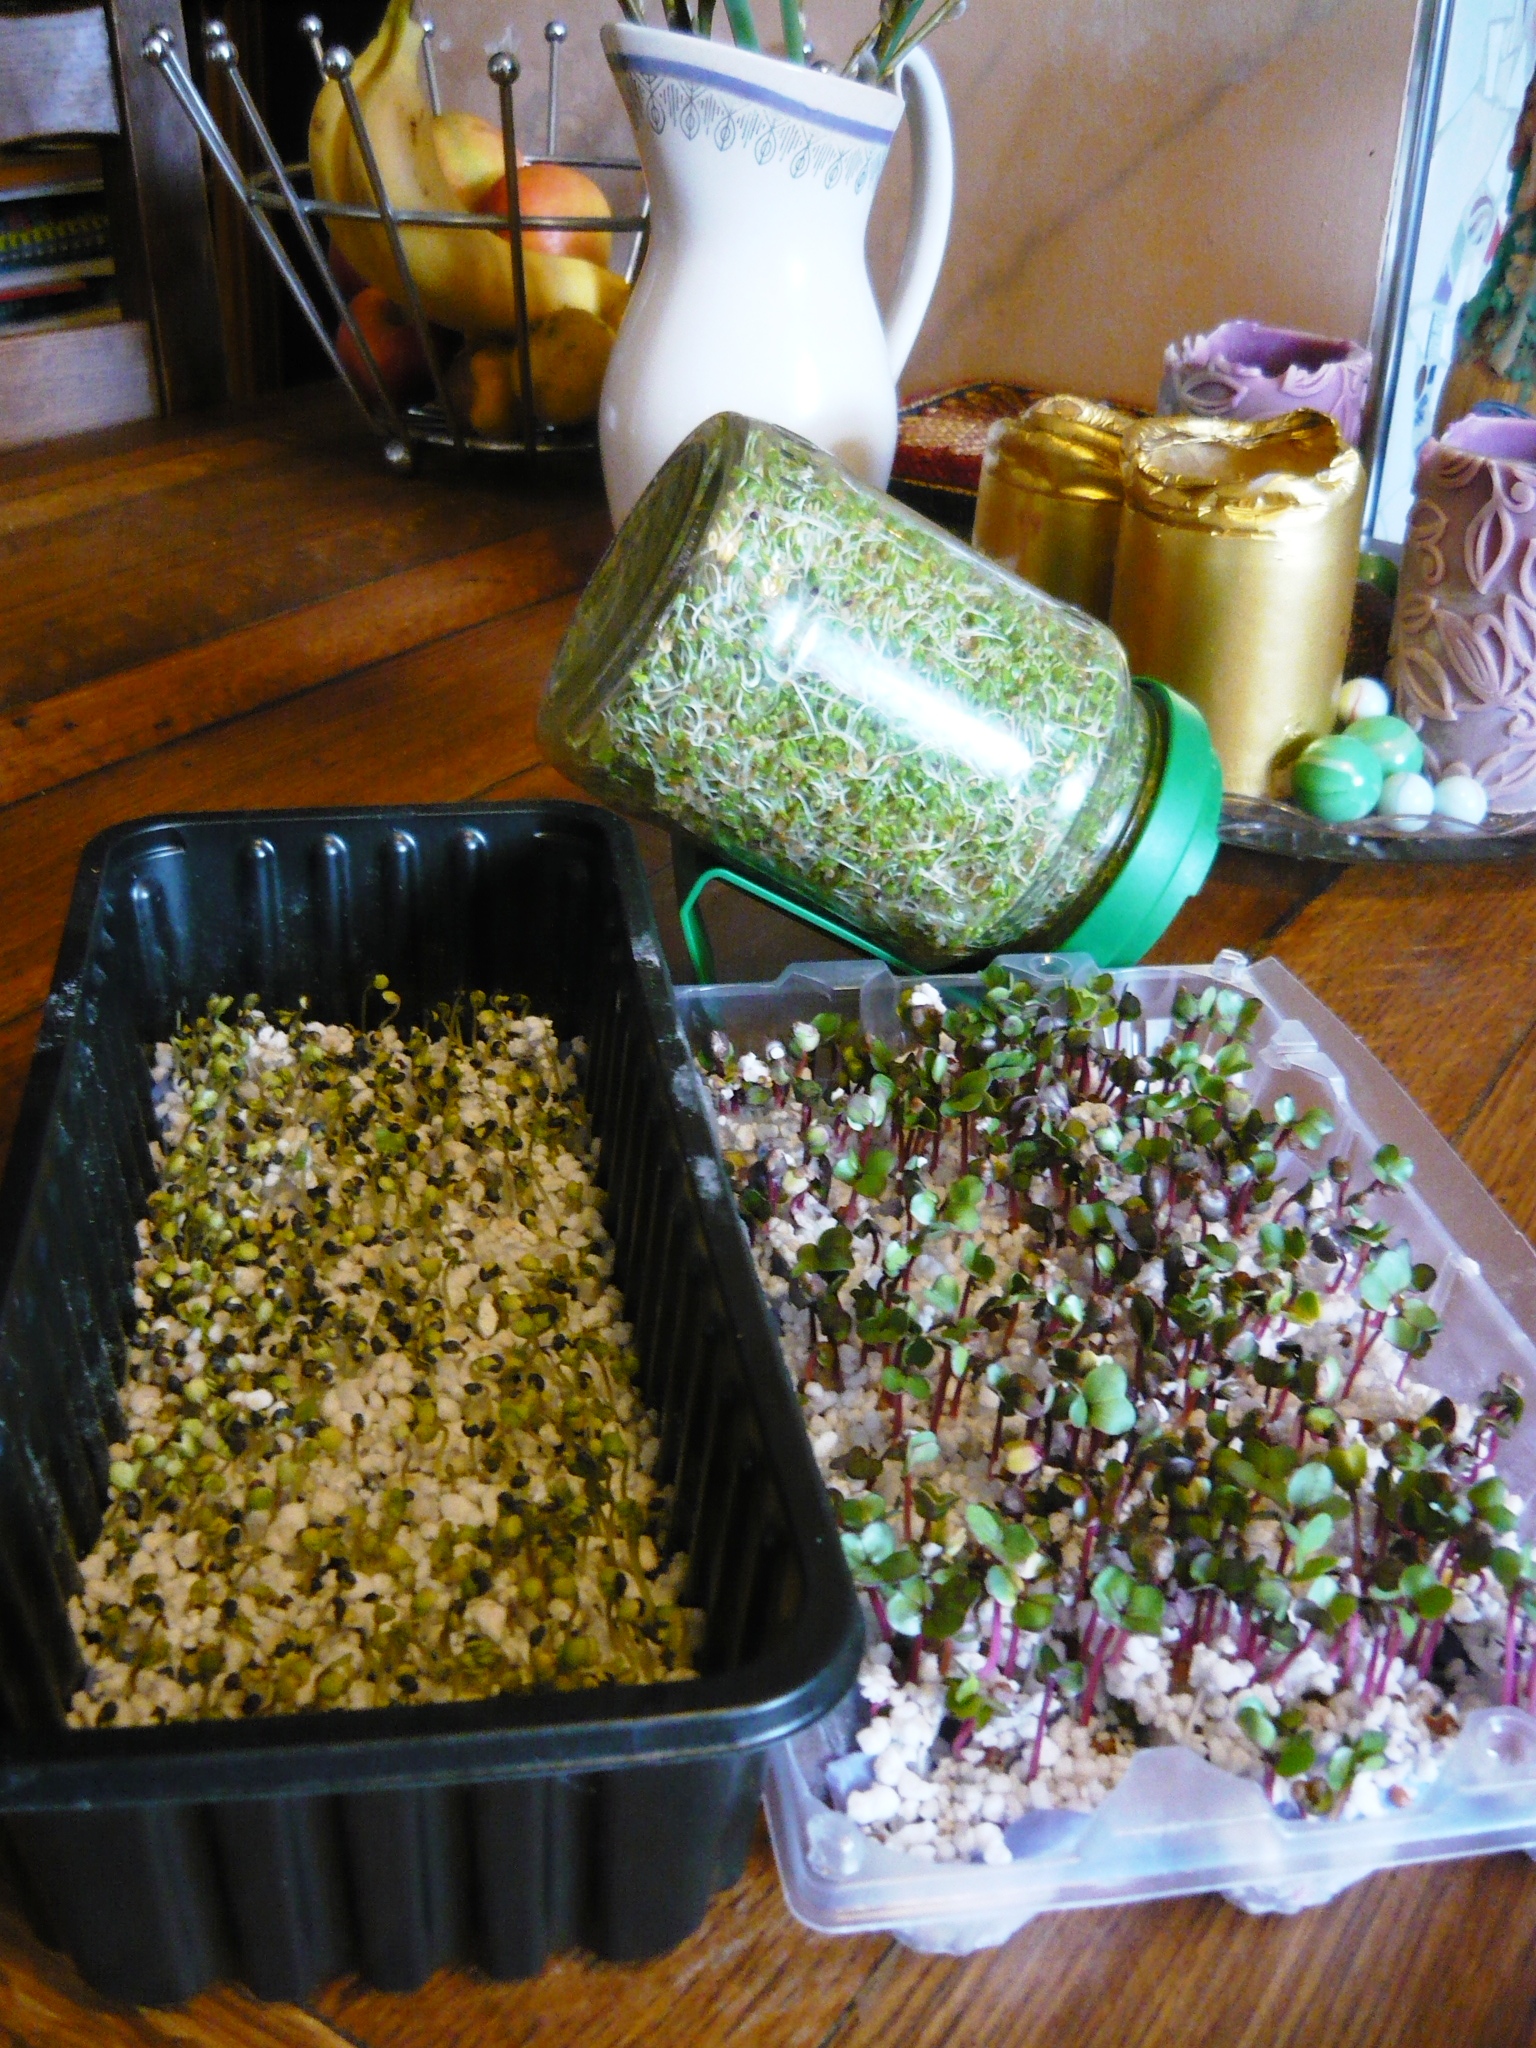
For tiny seeds like Alfalfa and Red Clover we use a jar. You can make one up from an old jar, a piece of cloth and some string or buy one like in the picture. We also sometimes use a three-tier sprouting device where the water trickles trough all the layers and collect in the bottom tray, great for watering your house plants with. It is important to soak all seeds and rinse them prior to sprouting. You will need to do your own research as different seeds need different times soaking. After that all you have to do is rinse them for two or three times a day.

 sprout jar

Almost everyone has grown some cress or mustard on a piece of damp kitchen paper as a child. We like to grow radishes and members of the cabbage family in this way. A week from planting you end up with a forest of small seedlings, jam-packed with flavour to use as a garnish on your food. If you use a bit of soil as well, the seedlings can grow slightly larger and be harvested as micro greens.

Pink Kale

This time of year we usually end up with some garlic sprouting in the kitchen before we have had a chance to eat it. If this happens to you, don’t throw them out. Plant all the cloves packed close together in a little soil in a pot and you will soon have lovely Green, cut and come again garlic shoots. We hope you will try some or all the things we have written about here. Sprouts are delicious, very good for the planet as they do not require transport, chilling in the shop etc. as with bought vegetables and they are very cheap to produce. We can promise you that once you get started, you will not want to stop.

Garlic sprouts

Helping our endangered bees.

Christmas rose

We always knew we wanted an organic garden brimming with wildlife. Unfortunately one of the most important assets to any garden, the bees, are under threat all over the world. There are many different reasons for this but we believe the biggest one is the use of pesticides, mainly insecticides containing neonicotinoids that are used by many gardeners and industries alike. Other causes are the extensive loss of natural floral habitats, due to modern farming as well as climate change and disease.  Recent wet summers, have made it difficult for bees to find pollen and the Varroa mite is a parasite that attacks bees, spreads viruses, and often cause the collapse of entire bee colonies. Honey bees and bumblebees are dying on a catastrophic scale and this is affecting every other living creature on the planet. Loss of the bees will lead to crop failure and starvation.

 The good news is that we can all do our bit in slowing this process down. By using no pesticides in our gardens and by providing plenty of flowers for pollen we can give the bees a better chance of surviving. Early in the year, there are not a lot of flowers around and planting some trees, shrubs and flowers that flower at this time of year, can be tremendously important to the bees. It is a good idea to use native plants, as the bees seem to prefer them and they are well suited to the area. We encourage the spread of dandelions, wild primroses and lesser celandine in different parts of our garden.

primrose

lesser celandine

We have planted mahonia, commonly called oregon grape, forsythia, magnolia and gorse. All of these trees and shrubs have winter or early spring flowers. Other useful additions include, hellebore, commonly called Christmas rose, heather, garden primrose and daffodils. We always favour single, old-fashioned varieties of flowers. Some modern plants are bred for showy, double blooms without much consideration for pollinators.

Hellebore detail

 Heather

daffodils

In the future we are planning to keep our own bees, but at the moment we are providing all the bumblebees and other local bees with the best possible habitat, all year around. It is a lovely feeling when you see the first bumblebees of the year, awoken by the spring sunshine and warmth, fly around in search of pollen and you know they will find it in the garden.  The more bees you can attract to your garden, the more of your fruits and vegetables will be pollinated, so everybody wins.  We believe it is the single most important thing any gardener can do. All of the photos were taken in our garden today.

 Garden Primrose.

A bottle wall with a difference.

 glass wall

We have always been fascinated by all the beautiful pictures of glass bottle walls on the internet, and have known for a long time that we wanted to incorporate some into our home. In fact, we started collecting bottles and jars and making up bottle bricks years before we had the chance to purchase our house.  When planning our extension, we went to a local joinery and looked at window seconds. There were a lot of PVC- windows and we were measuring away, considering how we might be able to fit them into our design, when the owner said; ‘Those sash windows are for sale as well’.

glass wall with cat

We were delighted as we had not even dreamt about coming across solid wood, double glazed sash windows, complete with traditional weights. We were able to buy the windows for less than a tenth of the original price, as they had been ordered to measure, but it turned out the measurements given had been wrong and they did not fit. One of the windows had a lovely arch at the top and we decided to complement the design with two arches of bottle walling.

 glass wall arches

We built frames out of 4” by 2” timber as you can see in the picture. We added crosspieces ever so often to stabilize the wall and make each bottle wall section into a manageable size. The construction was easy, we started by putting on two rows of cement mortar, with some insulation in the middle and put down our first row of bottles.  Any old jars, small bottles and glasses can be used. If you want to use wine bottles, you need to score and cut them first with a glass cutter.  Sometime it works to put a jar on top of a bottle and sometimes you need to put two jars together. We made up a bottle brick out of two cut wine bottles, and used it as a measure when we constructed all our bricks. For sealing the bottle bricks we used brown parcel tape and duct tape. When our first row was down, we put on more cement mortar, some insulation in the middle and more bricks, staggered in relation to the first row. It is very important to add small nails into the timber on the sides and into all the cross pieces to hold the cement mortar. We kept building in this manner, filling each section with  bottle bricks.

wall base

first layer

nails

wall half way

To give the wall a beautiful finish on the inside, we added blue glass mosaic tiles in between all the bottle bricks and across the spaces where the crosspieces are. We smoothed out the cement mortar and all that is needed now is a final layer of grout on the inside walls and a good clean of all the bricks.

 glass wall detail

We wanted lots of light so decided to incorporate some old cut glass bowls into our walls. When the sun light hits the bowls it refracts in the cut glass. We have never seen this done before but we are very happy with the sparkling, bright result. We made these bricks by taping two similar size bowls together. They end up not as deep as the others, but this adds textural interest to the wall.

 glass wall bowl

On the outside we still need to finish up, by adding some more cement mortar and smooth out the wall. We are thinking about tiling the spaces in between the bottles and grout, for a durable, maintenance free wall.

glass wall outside

Cushions for pennies.

sofa cushions 1

Just before Christmas, on one of our common Charity shop rambles, we came across some lovely fabrics. The first was a light green, American screen printed fabric from Braemore Design, the second a turquoise design with branches and birds from Design Edition Limited, 1981 and the third an unknown dark blue and red, Eastern European looking fabric. We got them for the bargain price of circa €1 each. The question was what to do with these as there was not enough of any one fabric for a large project.  We are planning a sofa built into the wall in our extension and the choice fell upon using our lovely finds, to make large cushions  for it. We already had some Laura Ashley rose printed fabric, a gift from a neighbour,  that fit nicely into the design.

 sofa cushions 3

Patchwork has been used for hundreds of years to make use of smaller pieces of fabric and creating a beautiful whole. We decided to do a very simple version for our sofa cushions. Anyone with basic sewing skills can manage a project like this, and you can adjust it to suit your taste and requirements. Here follows a description of how we made ours, if you would like to give it a go.

sofa cushions 12

 We used some 65x65cm inner cushions from IKEA, so the squares of fabric needed to start out as 75x75cm squares. We prefer tearing the fabric squares over cutting them, as it makes for  perfect straight edges.  Fold your fabric square into a triangle corner to corner and press the fold with your iron. Cut on the fold and fold the remaining triangles again, press and cut. You will end up with your square cut up in four equal triangles.  For four cushions you need four different fabrics.  If your fabrics have an up and down in the design, you might want to keep them all in the right direction on your finished cushions.  Put them out in a line on the floor all in the same direction and take the top piece from your first square, the left piece from your second square, the bottom piece from your third square and the right piece from your forth square. Put the pieces together for your first cushion and move on to do the same thing again, but this time start with the left piece from your first square, the bottom piece from your second square and so on, until all the pieces are used up. Sew two pieces together, press the seams, sew the other two pieces together and finally sew the whole lot into a square. We pressed the seams from the back and sewed again, close to the seam. This makes for a decorative finish but also strengthens the covers and they can stand up to numerous washes.

 sofa cushions 7

We had some old curtains that would make great cushion backs, but they were white, not a wise choice with four teenagers in the house, so we dyed them in the washing machine into a neutral brown. We tore them down the middle and turned the pieces around, overlapping each other along the middle, to make a slit opening on the back of each cushion. Place your backing fabric facing right side up and the sewn squares on top, right side down. Pin and sew around the edge. Cut the corners close to the seam [see picture] and turn right side out. Press and stitch close to the edge and then again further in, to create a wing all around the edge.

 sofa cushions 2

sofa cushions 5

sofa cushions 6

sofa cushions 8

sofa cushions 9

Using  fabrics in this way is very satisfying as you end up with a cohesive design when starting out with quite different individual pieces. Using old fabrics is economical, fun and good for the environment. We made 8 large cushion covers for a total of €13.50. In the pictures the covers are modeled on our sofa in our combined living and bedroom. We can’t wait until we have our extension finished and they can be moved into their intended place.

sofa cushions 10

sofa cushions 11

Tiling your memories.

Fireplace detail 3

Before moving into our home in January 2013 we needed to fix the fireplace in the kitchen. It is an open fire that has a back boiler and the hot water it produces can be used for baths and to heat the radiators. Unfortunately it had not been properly installed so there was a huge cavity next to the boiler and fumes could escape into the kitchen. The fireplace was nicely tiled but all of it had to come down, due to the repairs we had to carry out. So we were left with a blank canvas. We wanted to reuse the white tiles that had been on there and the ones taken of the kitchen walls as well as some white tiles friends had given us. We also wanted to incorporate a lot of pieces of broken plates and china. Every time we go for a walk we always keep an eye open for pieces of broken crockery. We have found some lovely pieces in the garden of our house as well, when planting trees and shrubs. They are especially nice to include as they belong to the history of the house. Some of them could go back to the 1920s when the house was built. As we are a family of six with no dishwasher, we also get quite a few broken pieces of our own. In fact our dinner plates are all old, some from our parents and grandparents and whenever we see a nice old pattern in the charity shop we buy it, even if it is just one or two plates. In this way it does not matter when a plate breaks as we will be happy to recycle it in a mosaic project, and there are always replacements at the ready. Including old crockery, coins and memorabilia really makes your tiling project unique and personal. Our apologies as some images are slightly out of focus, but they will still give you an idea of the project.

 Fireplace 1

There were a couple of pipes going from the back boiler to the tank and we had to build a cover for them. When it was done it looked so much like a house, that we had no choice but to make it into one. To bring some energy into the design we decided to make swirls and spirals from all the small crockery pieces, representing movement and gusts of wind. All our white tiles were used as a calming background to the colourful swirls.

 Fireplace 2

For a job like this, the readymade tile adhesive you can buy in a big tub or bucket is the best thing. We used small plastic toothed spreaders, which you can get in your tile or hardware shop. It is a fiddly job but very meditative and rewarding. Keep checking that your work is flat by putting the palm of your hand against it. Only spread the adhesive over a small section at a time.

 Fireplace 3

When it was all set and dry we used the powdered grout, mixing some grey and white for a nice colour. Follow the instructions on the package and keep wiping all your little pieces carefully when the grout is half hard to remove it from the tops but leave it in the gaps. A second grouting might be necessary. We also added a big Ash log for a mantle piece.

 Fireplace finished.

Fireplace detail.

We found the lovely metal tiles around the frame in a tile skip outside our local tile shop. They were happy for us to take away as many tiles as we wanted, but please remember to bring gloves and ask politely if you are planning an excursion. We really hope you will get inspired to try a mosaic project of your own. A table top, flowerpot or pot stand will get you going and then there will be no stopping you.

Fireplace detail 2

Building a Gazebo with a living roof. Part 2.

winter 2014 259

Following on from our last post, with all the henge pieces nailed to the uprights we moved on to the roof. The easiest way to do that was to make a reciprocal roof. For this design you need an upright post called a ‘deadman’. The formula for the deadman = height of henge + ( diameter of roof beams (thin end) x number of roof beams ) this should stand on a block of wood that is easy to remove. With a reciprocal roof there is a hole in the middle where the beams do not touch. The smaller the hole the steeper the roof, the larger the shallower. We decided we wanted a 70 cm. diameter hole, so we put our deadman 35 cm. from the centre. The first roof beam goes from the top of one of the posts and leans on the deadman. The second roof beam leans on the first and we temporarily tied them together before nailing, to allow for some adjustments. We worked our way through to the last beam which is the tricky one as it goes over the previous beam and under the first. So all the beams are sitting on the one before. The following two pictures are from another roof but show the process clearly.

reciprocal roof.

Roof beams.

You can remove your deadman safely once all the beams have been nailed together and nailed to the top of the henges. Pre drilling the nail holes is advised to stop the wood from splitting. We left our deadman in place as the Leylandii is very springy and made a bouncy roof. We then strung polypropylene rope in a spiral to support the tarpaulin. We fixed it with wire staples to all the beams. We have not seen this technique used before but we wanted a cheap and easy way to have some support between the beams. It works well and we have since used it on our extension. The polypropylene does not break down as it is not exposed to UV light.

Roof with ropes.

Centre of roof.

The tarpaulin was draped over the ropes and cut off, leaving an excess overhanging the edges. We then rolled this around a piece of wood, in each section and nailed it on top of the beams. This makes a solid edge that stops the soil from washing away. We then covered it with a layer of material, we had been given some carpet backing that was suitable. You could use hessian, old canvas or old carpets. We covered this with a thin layer of soil and seeded it, the roots of the plants grew into the fabric and bound the roof together. We also used some bird netting to hold the soil in place while the plants were growing. It is still there and now the whole roof is very green and flowers grow all over it. We used Clover and mixed meadow flower seeds as well as the grass that was in the soil. This year we have added some Nasturtium seeds and we are hoping they will trail over the edge. We had some off cuts of wood that we used for low walls. On each upright we added a piece of wood to each side that we nailed the off cuts to.

Gazebo view.

Gazebo

For the floor we put down some quarry dust to level it and then a layer of permeable plastic weed control followed by a layer of Leylandii mulch. This has worked really well, with no weeds after nearly two years. This gazebo cost next to nothing. One bag of cement, one reinforcement-bar, tarpaulin, a coil of rope, some 4inch and 6inch nails, some 2×1 rolling pieces of wood and some flower seeds. All in all less than €100. A very low price to pay for a practical, beautiful and comfortable outdoor room. We use it all year around, for meals, playing music, having friends around and doing homework. Have a go, it is quite easy and fun. 

Gazebo in winter.

Building a Gazebo with a living roof. Part 1.

We live in the West of Ireland. It rains a lot here and we wanted somewhere to sit under cover in the garden. After we built our Gazebo, we discovered it was also a lovely place to sit in the shade on a hot summers day. When we moved in to our home it was surrounded with thick, tall Leylandii hedges. There was no light in most of the garden and the whole place felt very enclosed and cut off from the surrounding country side. We decided to replace the hedges with espalier Apple trees, Oak, Beech, Hawthorn, Hazel, Chestnut, Elder, and some other varieties. This is much better for wildlife.

Gazebo.

It left us with lots of cut down trunks and smaller branches. We mulched all the small bits for paths and the Gazebo floor. We used much of what was left to construct the Gazebo, choosing the most interesting shapes. This is a project much easier than it looks, so anyone can have a go. The main construction was finished in four days with only two of us working. A few of you could do it over a couple of weekends, giving you time for the concrete in the bases to set.

Start of by deciding how big you want it. Ours is about 3.5 meters across on the inside. Remember that a big Gazebo will require thicker wood. Put a stake in the middle and mark out a circle using a piece of string. Divide it into eight equal parts or any number you choose.

Construction.

Getting ready.

We put our uprights on bases as our original trees were trimmed to 1.8 meters. This left our timber a little short. You could do this or dig holes for your small concrete foundations. We put our bases straight on the ground using cardboard moulds. We lined these with stones and poured concrete in the middle with a piece of reinforcement-bar in the center protruding about 10 cm. We drilled a hole in the base of each post and just stood them on the bases. The next step is joining all the tops of the upright post with a ‘henge’ piece.

Concrete base.

In our next post we will tell you how we made our roof.

Posts up.

Beautiful edible perennials.

We have a lot of slugs in our garden. It is a problem as annual vegetables and flowers tend to be attacked when they are small. We still like to grow them, but we also decided early on to go down the perennial route as well. We do have a lot of Nettles, Dandelions and Chickweed growing wild in the garden and like to cook with all of them. Good King Henry, Turkish Rocket and Wild garlic have been added to our collection of perennial vegetables.

Perennial vegetables.

They are reliable and tasty and because they grow in abundance, very hard for the slugs to eradicate. We also like pretty flowers and sometimes they go hand in hand with food production. The Daylily, Hemerocallis is a popular perennial that grows in gardens everywhere. Many Daylilies are edible and have been used throughout China and other parts of Asia for a very long time. We love to eat them, both in salads and stir fries.

daylily

Another reliable salad plant is the Ice Plant, Sedum Spectabile, that has succulent leaves, very tasty in a mixed salad. This is a purple variety along with some Nasturtiums.

Iceplant and Nasturtiums.

Cardoons and Artichokes bring great beauty as well as taste to the vegetable garden.

Artichokes and cardoons.

Cardoon

We can not exclude the Sunflowers, Nasturtiums and Borage, although they are annuals, they like to seed themselves around the place and can all be eaten as well as provide floral beauty and food for beneficial insects.

nasturtiums and borage.

It is in fact easy to create a vegetable garden full of edible flowers. We like to incorporate as many flowers as possible in our annual vegetable patch as it confuses some pests and add a lot of joy as well as taste. It is a lot of fun but please make sure you know exactly what you are growing and eating to avoid any toxic plants.

For further reading we highly recommend:

James Wong’s Homegrown Revolution

and

Creating a Forest Garden: Working with nature to grow edible crops. By Martin Crawford.

Building a wild life pond.

FA pond adds beauty, biodiversity and a great feeling of tranquillity to any garden. We always knew we wanted one. Our work commenced in the spring of 2013, with digging. It is good to site a pond away from trees as the leaves will fall into it, fouling the water. We made the mistake and had to cut down an Ash tree. It was sad but we have planted a couple of hundred trees now so we have somewhat made up for the damage caused.Some shade is good at least for part of the day. It is also good to make the pond as large as possible as it will help in creating a clear healthy environment. For a wildlife pond you need at least one side of it to be a gentle slope, where wildlife can have easy access in and out of the water. It is also good to have some different shelves and levels under the water for plants and animals.

Digging the pond.

Digging the pond 2

The pond-liner we used is made from Polyex and comes from Bradshaws Direct in the UK. When used with an underlay it is guaranteed for 35 years. We also wanted a bog garden and you can see it here in this photo, as the lighter shallower part.

Pondliner in place

To prevent the soil in the bog garden part from entering the pond we built a small stone wall, separating the two. We filled the bog garden part with a mix of moss peat, manure, compost and garden soil and planted it up with water-loving marginal plants. We built up the edges under the liner all the way around the pond and bog garden with small stones and soil to give it an even edge. It is important to check your levels before you start digging as the ground needs to be relatively flat for the water to stay in. We then covered the edge of the liner with a small stone wall and in one part a pebbled beach, great for small creatures and larger ones too, like hedgehogs, coming for a drink.

Bog garden planted up.

We filled the pond in June 2013 partly with water from a stream in our garden and partly with rain water. It was to late for frogs, toads and newts to spawn that year but some of them moved in to the area surrounding the pond.

summer 2013

In 2014 we had hundreds of little frogs hatching as well as a good number of newts. We hope they will be a great help in keeping the number of snails and slugs in the garden under control. Water beetles, whirligig beetles and many other creatures now inhabit our pond and it is a very beautiful place to sit and observe all the wild life. The first picture below is from Winter 2014 and the following from Summer 2014. You can see how much these plants love having their roots in water. 

winter 2014

summer 2014

summer 2014 2