A bottle wall with a difference.

 glass wall

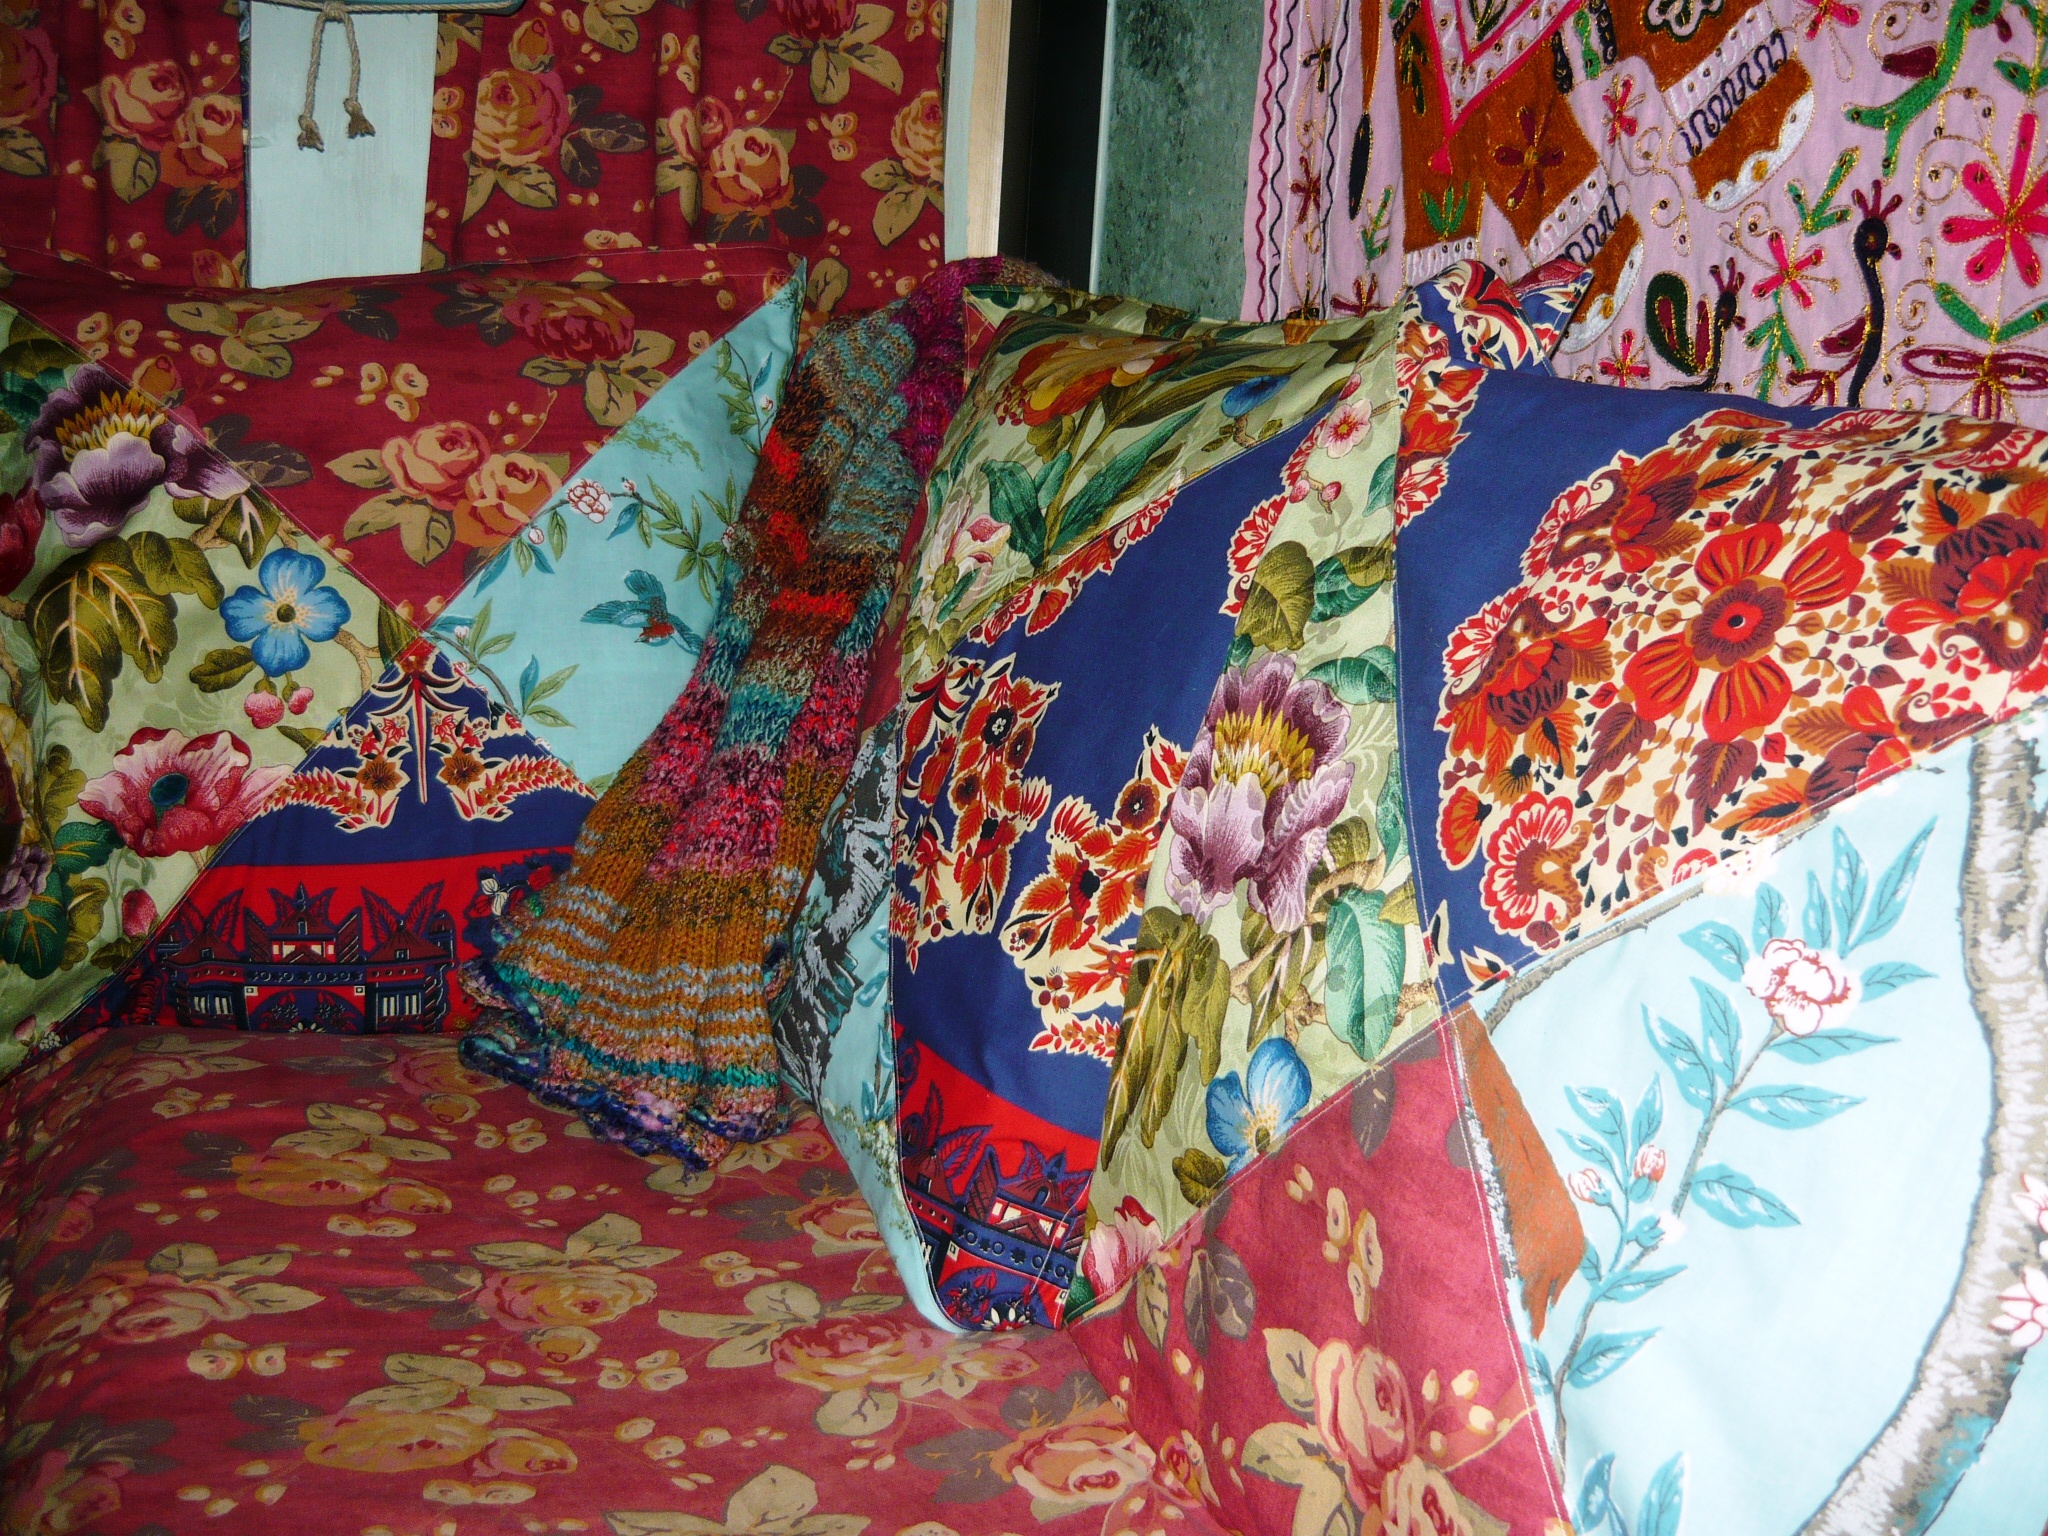
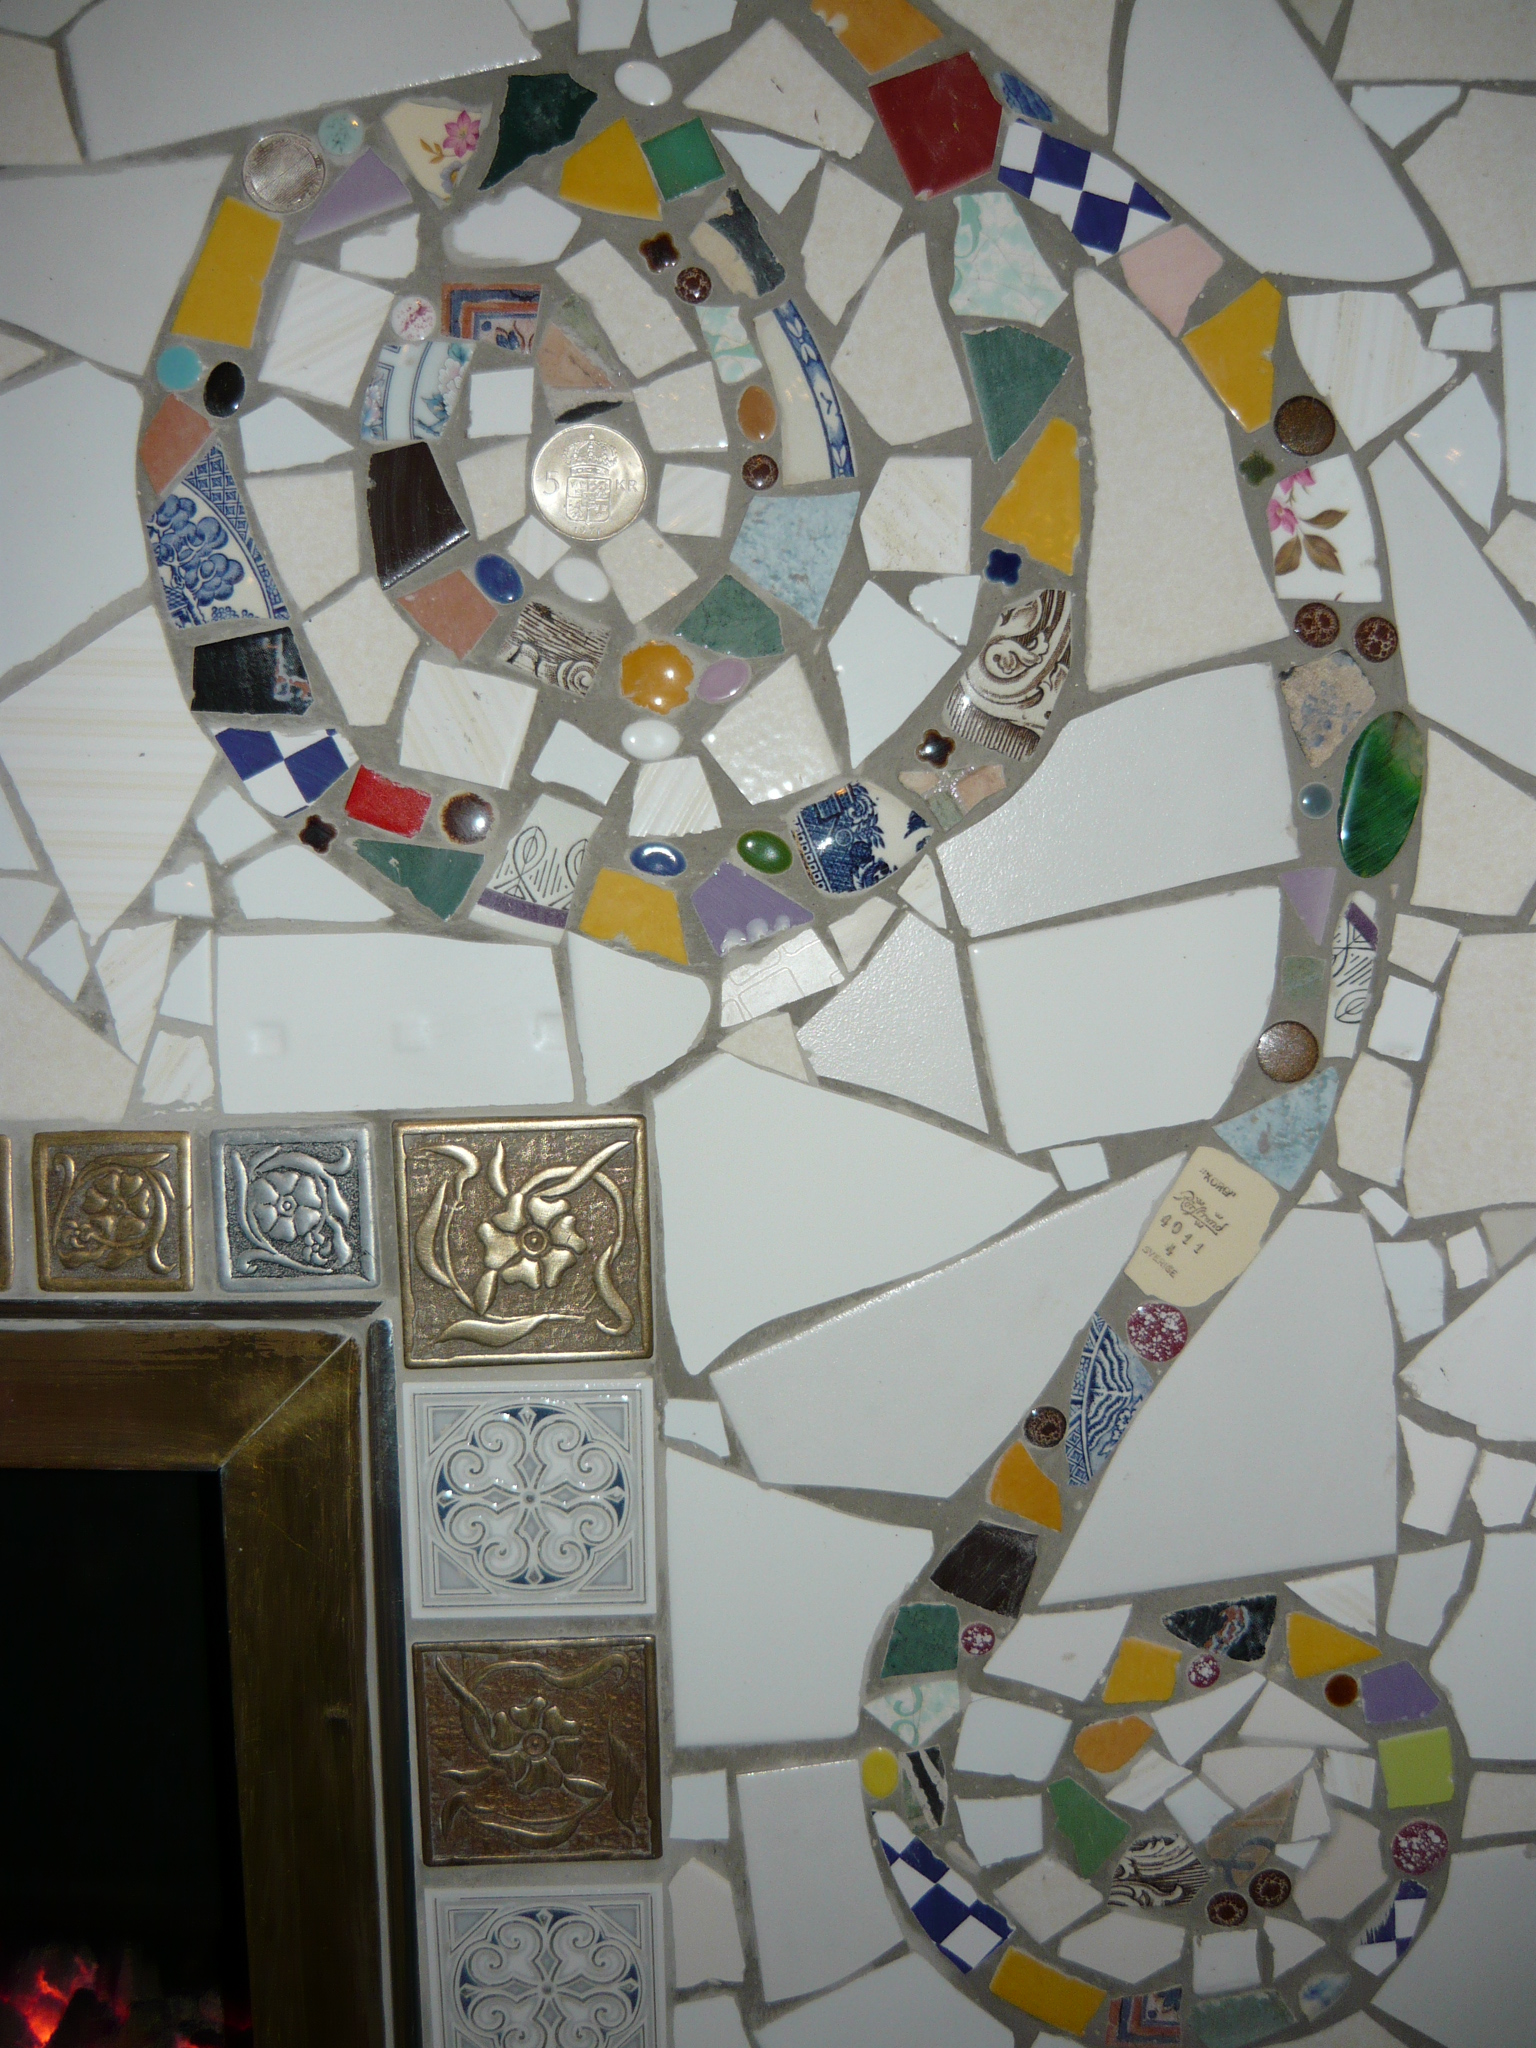
We have always been fascinated by all the beautiful pictures of glass bottle walls on the internet, and have known for a long time that we wanted to incorporate some into our home. In fact, we started collecting bottles and jars and making up bottle bricks years before we had the chance to purchase our house.  When planning our extension, we went to a local joinery and looked at window seconds. There were a lot of PVC- windows and we were measuring away, considering how we might be able to fit them into our design, when the owner said; ‘Those sash windows are for sale as well’.

glass wall with cat

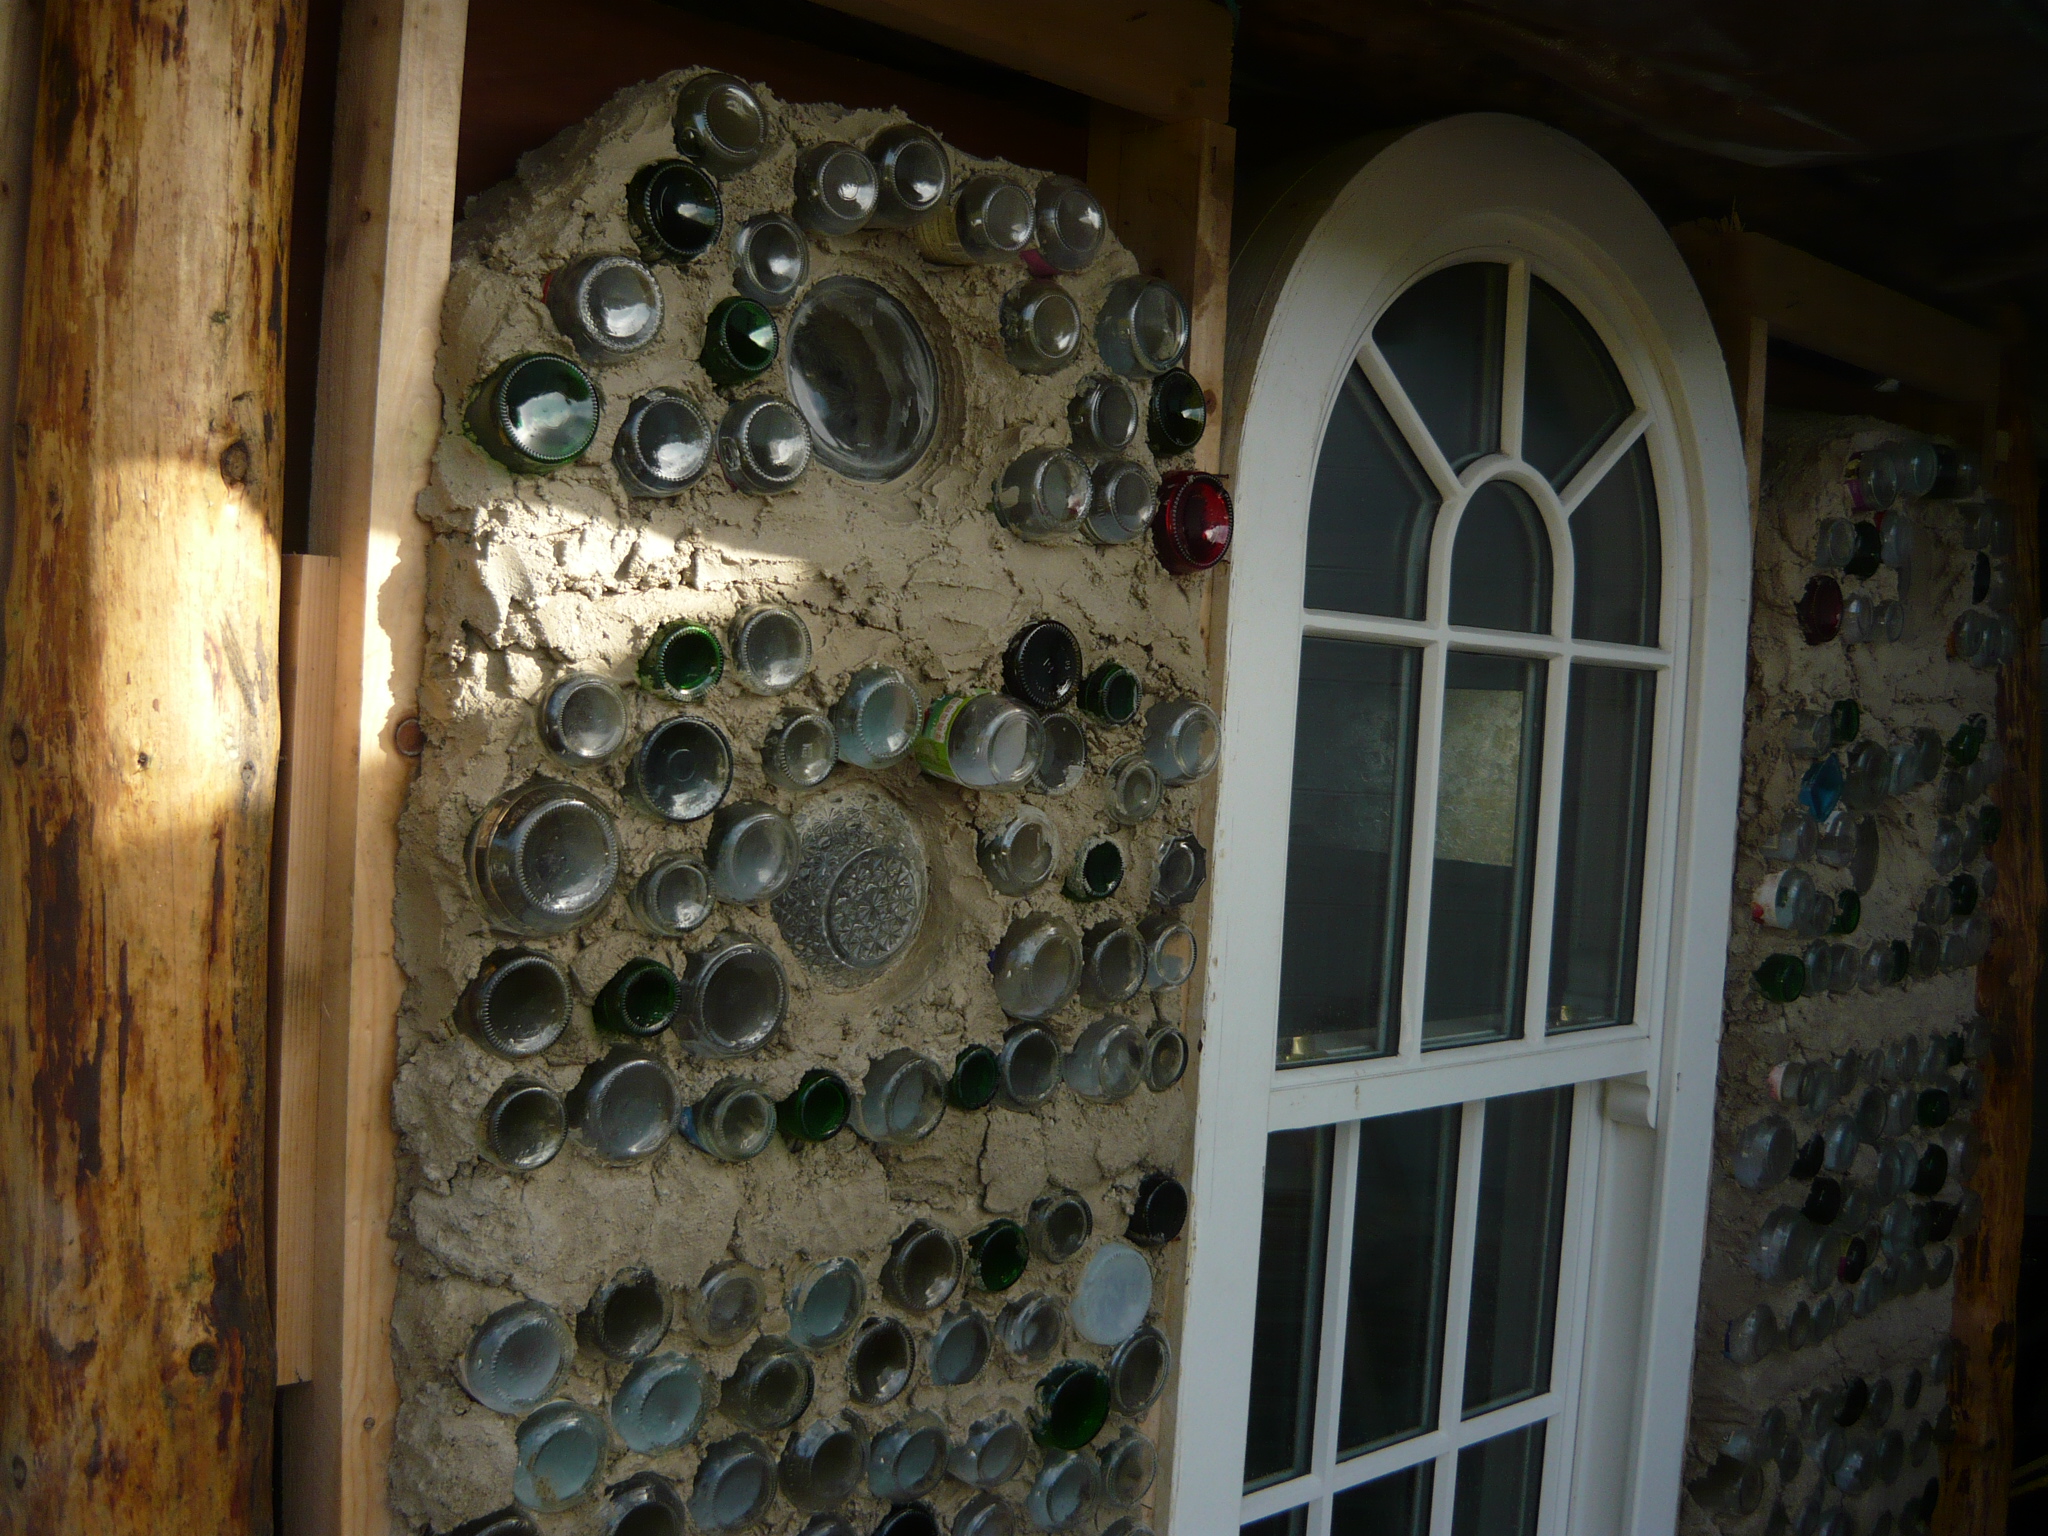
We were delighted as we had not even dreamt about coming across solid wood, double glazed sash windows, complete with traditional weights. We were able to buy the windows for less than a tenth of the original price, as they had been ordered to measure, but it turned out the measurements given had been wrong and they did not fit. One of the windows had a lovely arch at the top and we decided to complement the design with two arches of bottle walling.

 glass wall arches

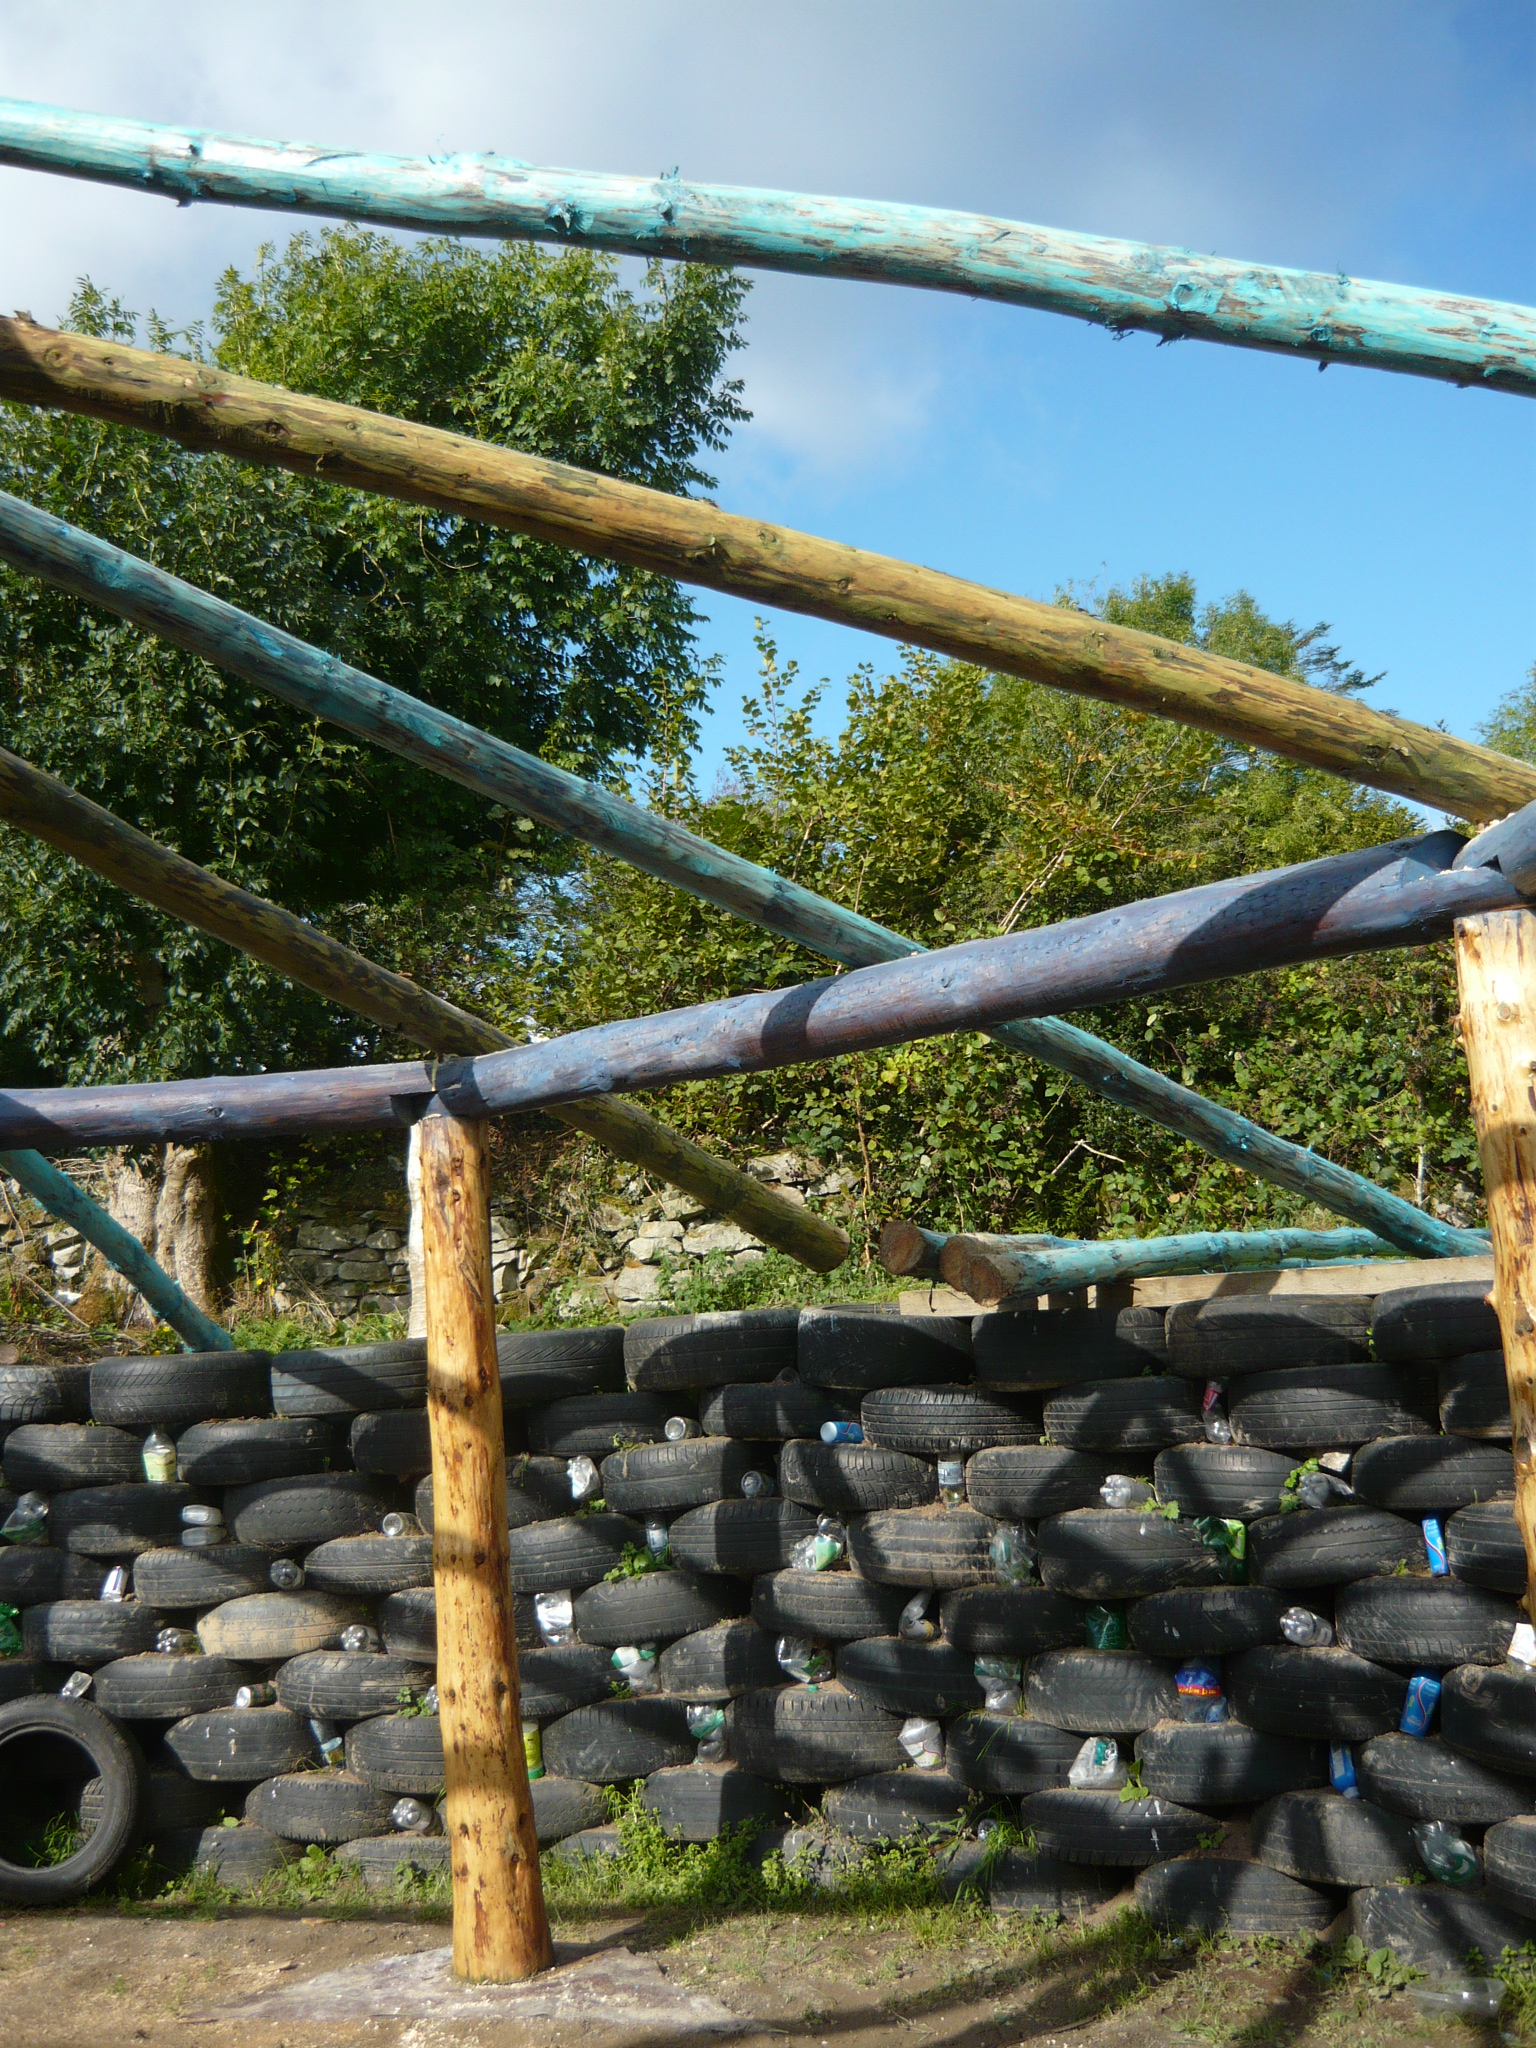
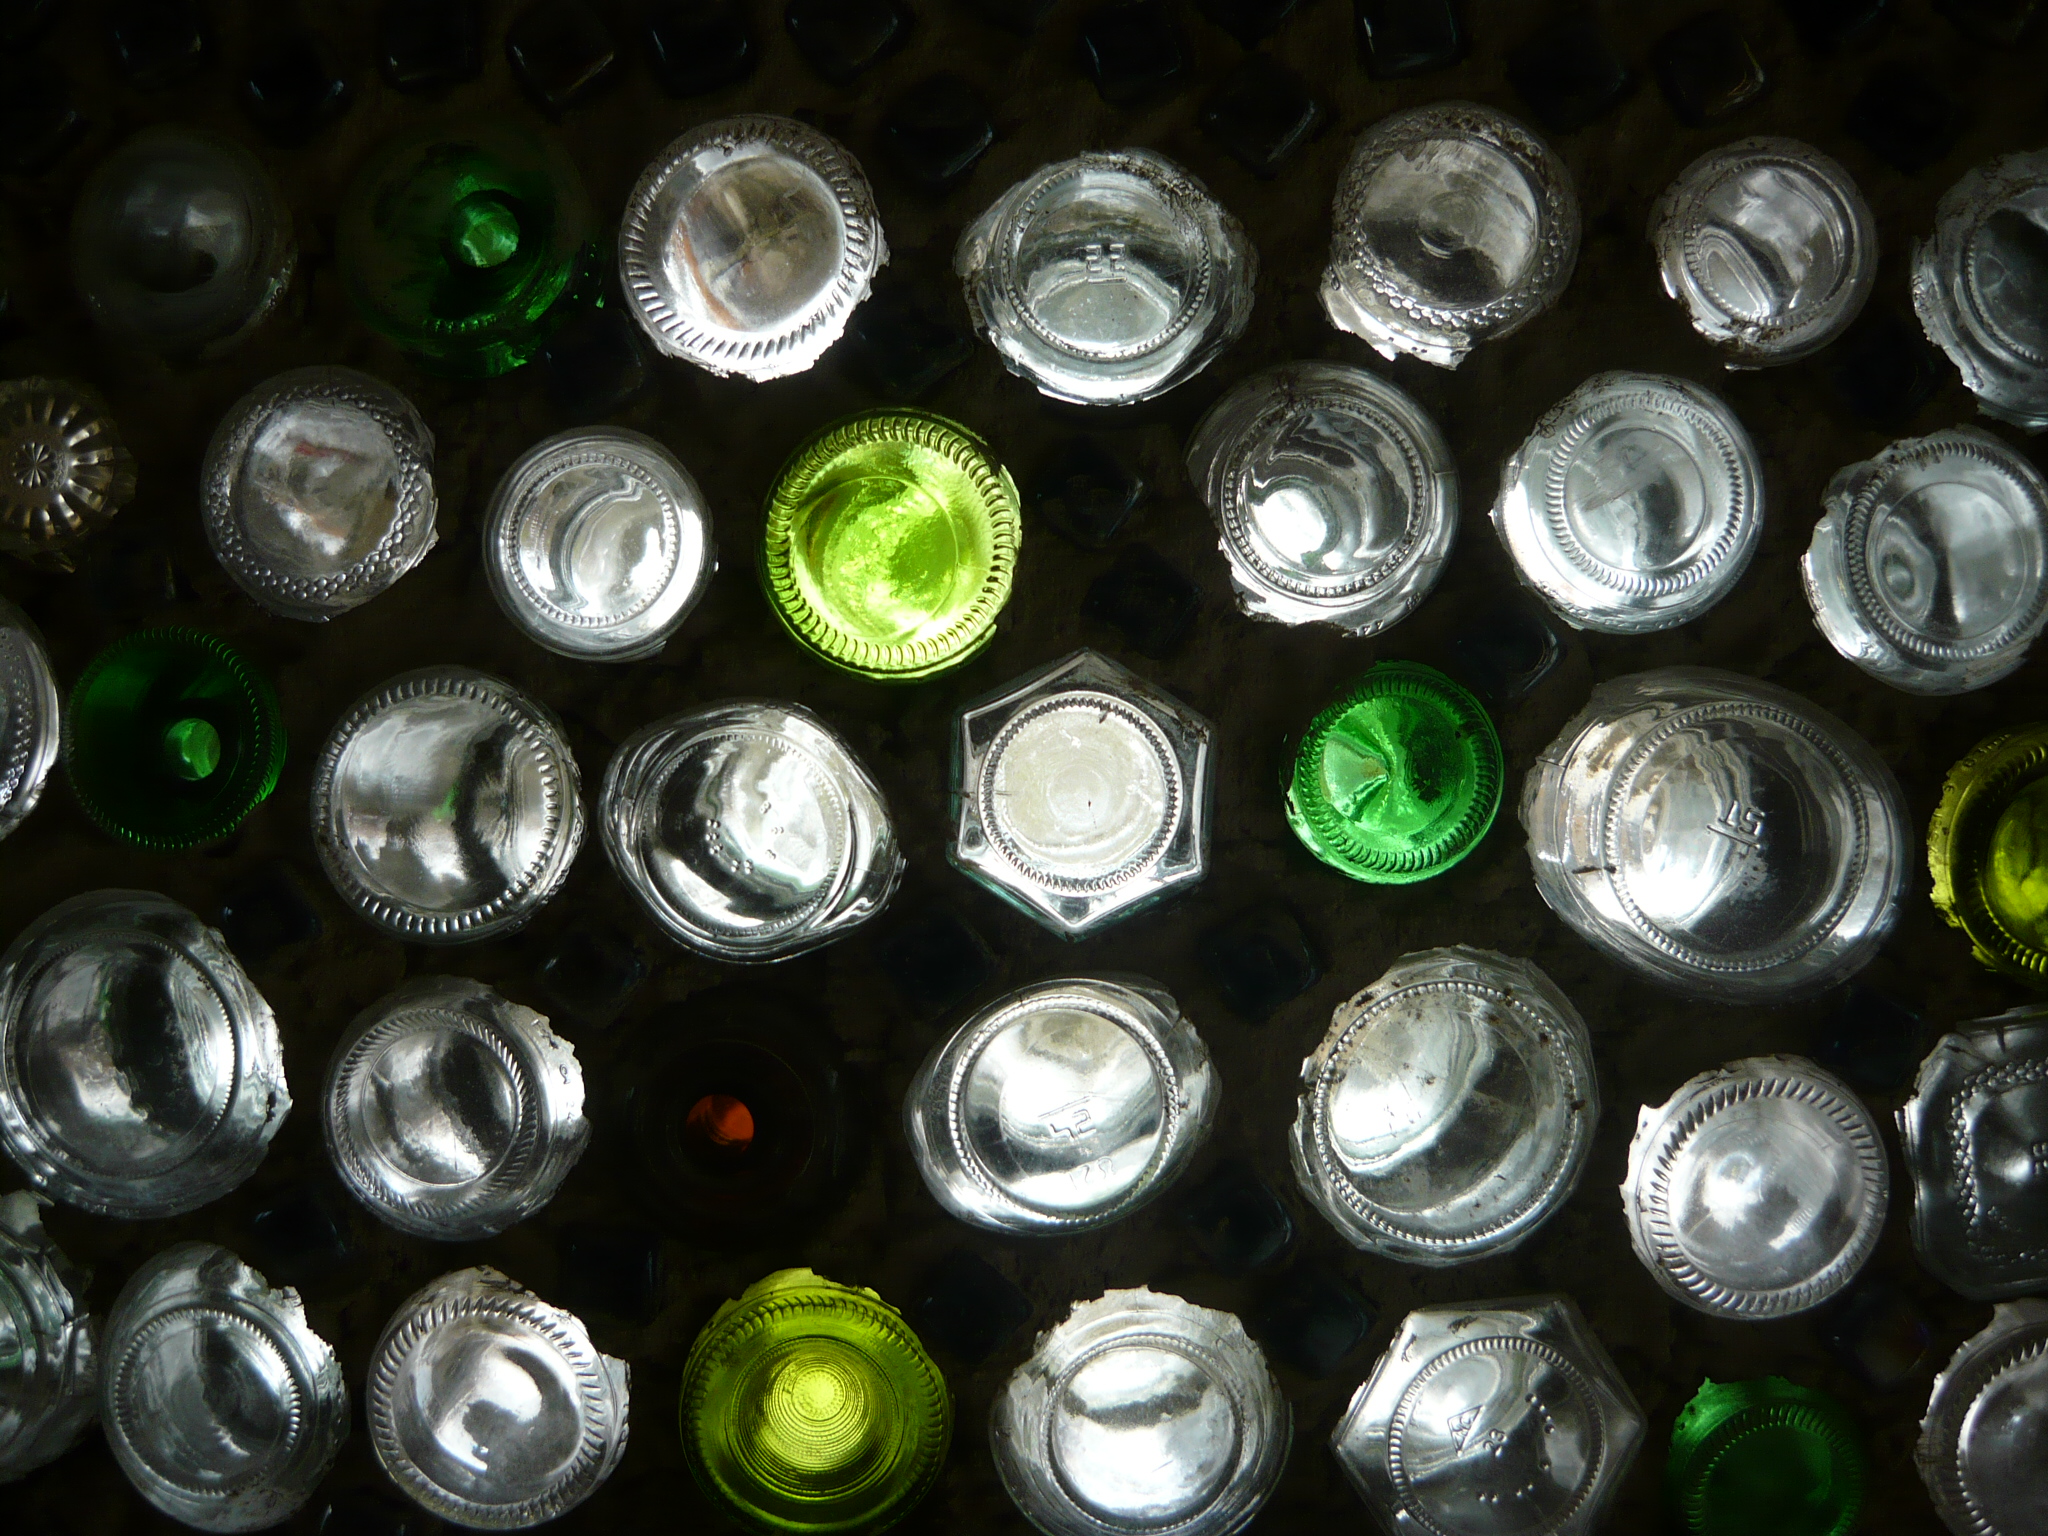
We built frames out of 4” by 2” timber as you can see in the picture. We added crosspieces ever so often to stabilize the wall and make each bottle wall section into a manageable size. The construction was easy, we started by putting on two rows of cement mortar, with some insulation in the middle and put down our first row of bottles.  Any old jars, small bottles and glasses can be used. If you want to use wine bottles, you need to score and cut them first with a glass cutter.  Sometime it works to put a jar on top of a bottle and sometimes you need to put two jars together. We made up a bottle brick out of two cut wine bottles, and used it as a measure when we constructed all our bricks. For sealing the bottle bricks we used brown parcel tape and duct tape. When our first row was down, we put on more cement mortar, some insulation in the middle and more bricks, staggered in relation to the first row. It is very important to add small nails into the timber on the sides and into all the cross pieces to hold the cement mortar. We kept building in this manner, filling each section with  bottle bricks.

wall base

first layer

nails

wall half way

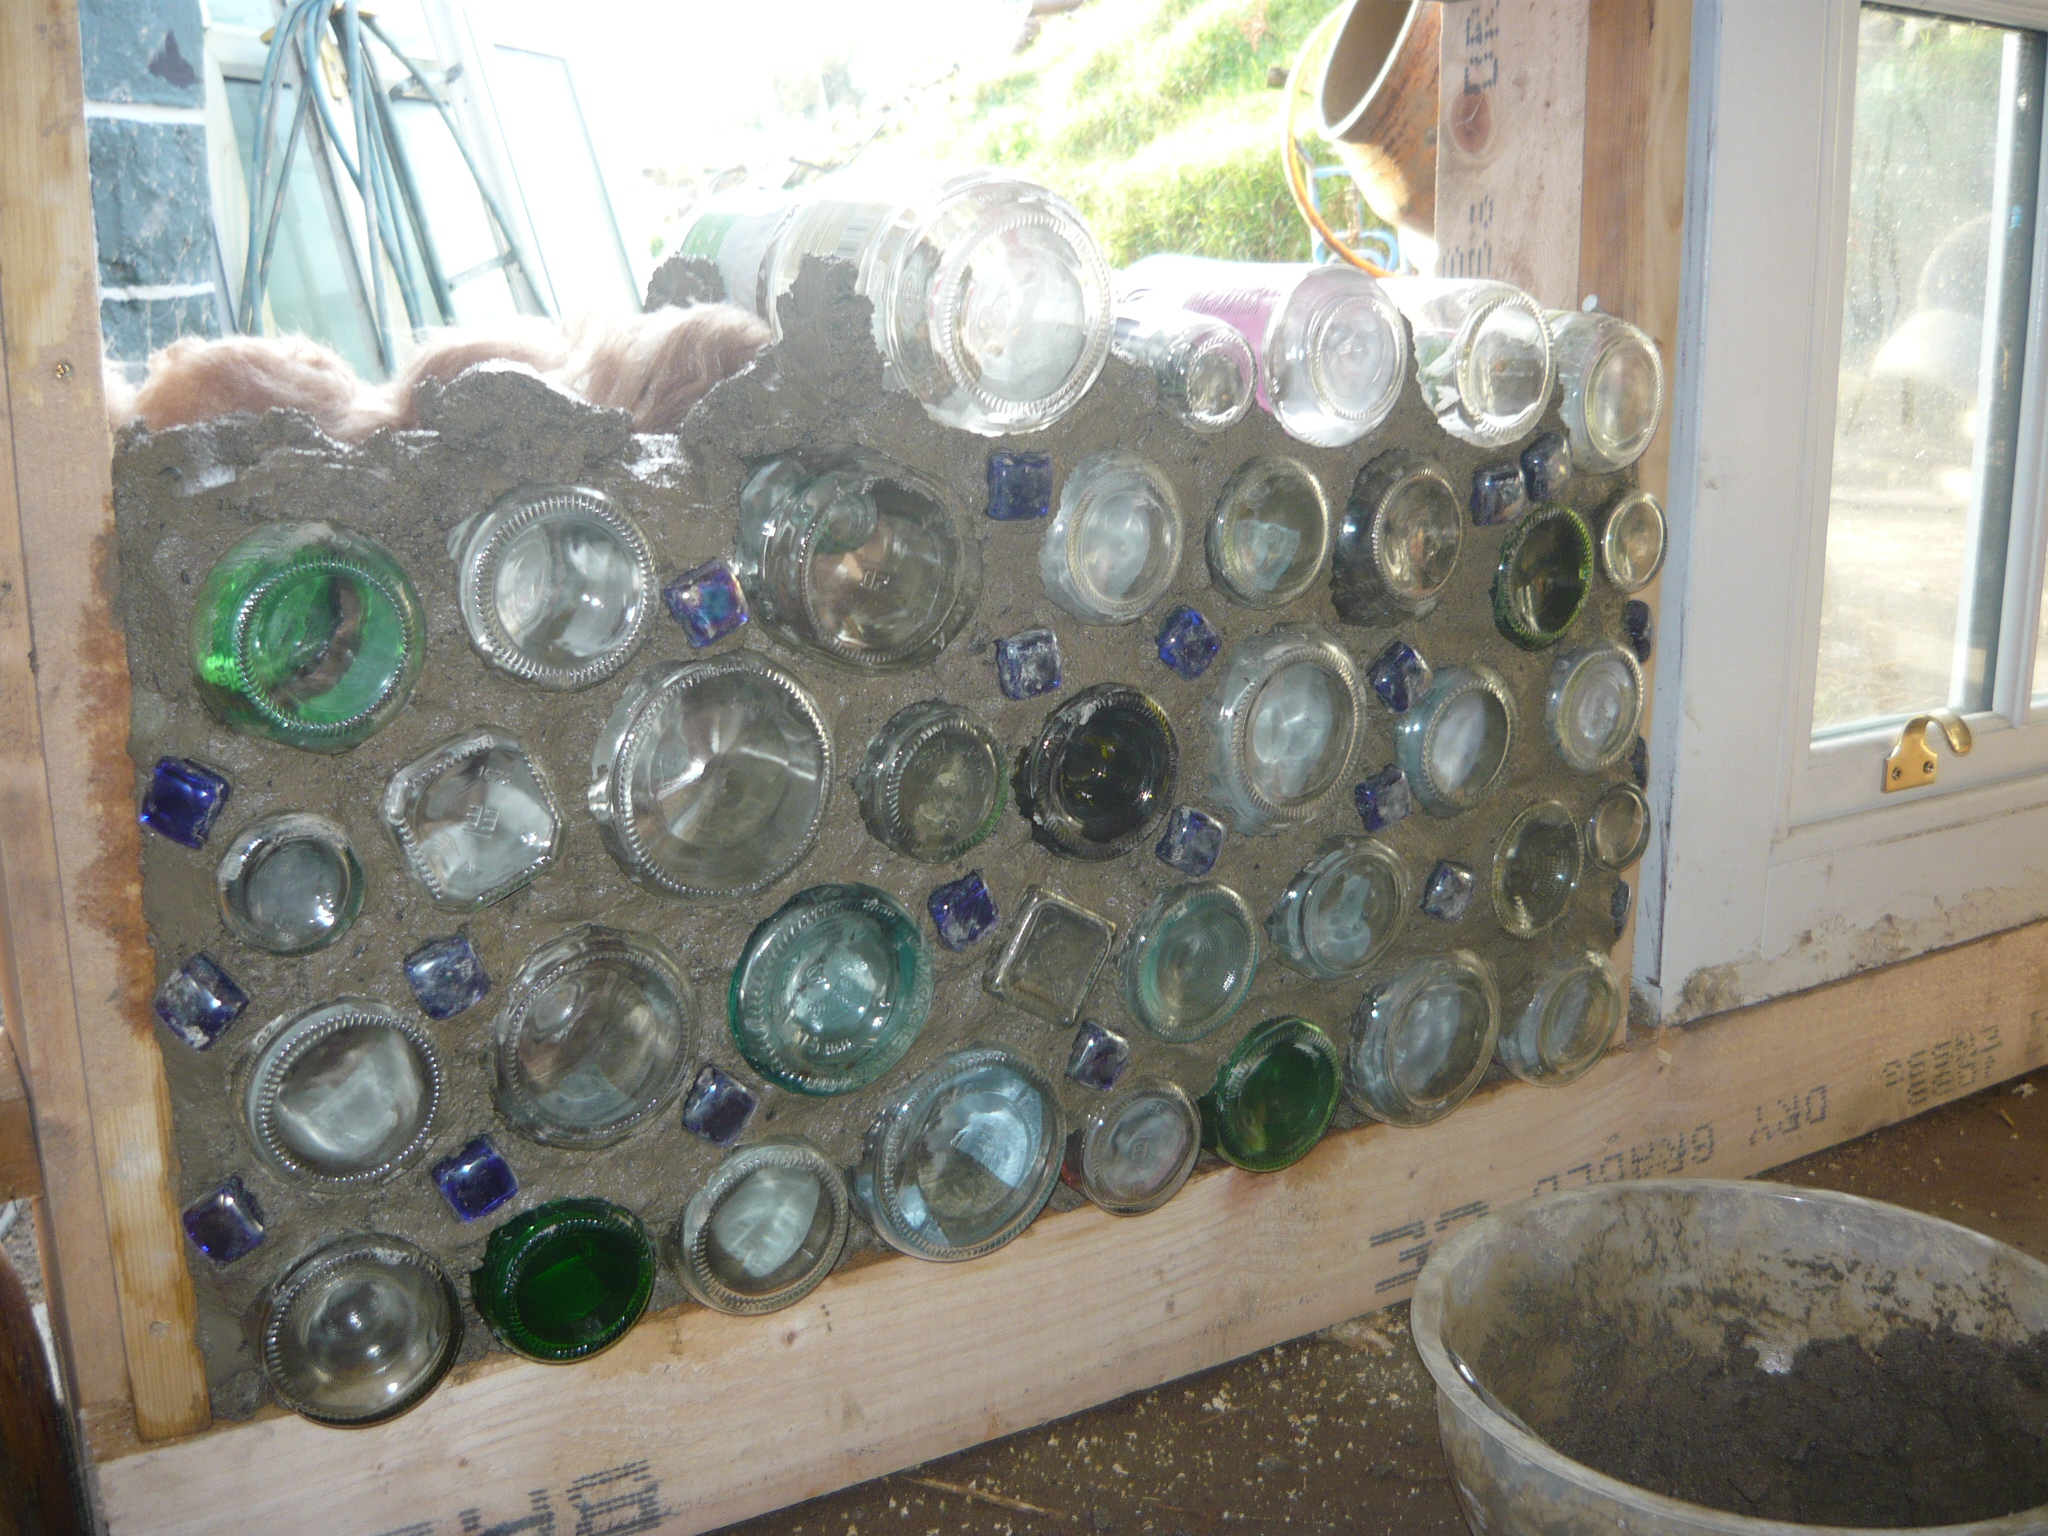
To give the wall a beautiful finish on the inside, we added blue glass mosaic tiles in between all the bottle bricks and across the spaces where the crosspieces are. We smoothed out the cement mortar and all that is needed now is a final layer of grout on the inside walls and a good clean of all the bricks.

 glass wall detail

We wanted lots of light so decided to incorporate some old cut glass bowls into our walls. When the sun light hits the bowls it refracts in the cut glass. We have never seen this done before but we are very happy with the sparkling, bright result. We made these bricks by taping two similar size bowls together. They end up not as deep as the others, but this adds textural interest to the wall.

 glass wall bowl

On the outside we still need to finish up, by adding some more cement mortar and smooth out the wall. We are thinking about tiling the spaces in between the bottles and grout, for a durable, maintenance free wall.

glass wall outside

Cushions for pennies.

sofa cushions 1

Just before Christmas, on one of our common Charity shop rambles, we came across some lovely fabrics. The first was a light green, American screen printed fabric from Braemore Design, the second a turquoise design with branches and birds from Design Edition Limited, 1981 and the third an unknown dark blue and red, Eastern European looking fabric. We got them for the bargain price of circa €1 each. The question was what to do with these as there was not enough of any one fabric for a large project.  We are planning a sofa built into the wall in our extension and the choice fell upon using our lovely finds, to make large cushions  for it. We already had some Laura Ashley rose printed fabric, a gift from a neighbour,  that fit nicely into the design.

 sofa cushions 3

Patchwork has been used for hundreds of years to make use of smaller pieces of fabric and creating a beautiful whole. We decided to do a very simple version for our sofa cushions. Anyone with basic sewing skills can manage a project like this, and you can adjust it to suit your taste and requirements. Here follows a description of how we made ours, if you would like to give it a go.

sofa cushions 12

 We used some 65x65cm inner cushions from IKEA, so the squares of fabric needed to start out as 75x75cm squares. We prefer tearing the fabric squares over cutting them, as it makes for  perfect straight edges.  Fold your fabric square into a triangle corner to corner and press the fold with your iron. Cut on the fold and fold the remaining triangles again, press and cut. You will end up with your square cut up in four equal triangles.  For four cushions you need four different fabrics.  If your fabrics have an up and down in the design, you might want to keep them all in the right direction on your finished cushions.  Put them out in a line on the floor all in the same direction and take the top piece from your first square, the left piece from your second square, the bottom piece from your third square and the right piece from your forth square. Put the pieces together for your first cushion and move on to do the same thing again, but this time start with the left piece from your first square, the bottom piece from your second square and so on, until all the pieces are used up. Sew two pieces together, press the seams, sew the other two pieces together and finally sew the whole lot into a square. We pressed the seams from the back and sewed again, close to the seam. This makes for a decorative finish but also strengthens the covers and they can stand up to numerous washes.

 sofa cushions 7

We had some old curtains that would make great cushion backs, but they were white, not a wise choice with four teenagers in the house, so we dyed them in the washing machine into a neutral brown. We tore them down the middle and turned the pieces around, overlapping each other along the middle, to make a slit opening on the back of each cushion. Place your backing fabric facing right side up and the sewn squares on top, right side down. Pin and sew around the edge. Cut the corners close to the seam [see picture] and turn right side out. Press and stitch close to the edge and then again further in, to create a wing all around the edge.

 sofa cushions 2

sofa cushions 5

sofa cushions 6

sofa cushions 8

sofa cushions 9

Using  fabrics in this way is very satisfying as you end up with a cohesive design when starting out with quite different individual pieces. Using old fabrics is economical, fun and good for the environment. We made 8 large cushion covers for a total of €13.50. In the pictures the covers are modeled on our sofa in our combined living and bedroom. We can’t wait until we have our extension finished and they can be moved into their intended place.

sofa cushions 10

sofa cushions 11

Tiling your memories.

Fireplace detail 3

Before moving into our home in January 2013 we needed to fix the fireplace in the kitchen. It is an open fire that has a back boiler and the hot water it produces can be used for baths and to heat the radiators. Unfortunately it had not been properly installed so there was a huge cavity next to the boiler and fumes could escape into the kitchen. The fireplace was nicely tiled but all of it had to come down, due to the repairs we had to carry out. So we were left with a blank canvas. We wanted to reuse the white tiles that had been on there and the ones taken of the kitchen walls as well as some white tiles friends had given us. We also wanted to incorporate a lot of pieces of broken plates and china. Every time we go for a walk we always keep an eye open for pieces of broken crockery. We have found some lovely pieces in the garden of our house as well, when planting trees and shrubs. They are especially nice to include as they belong to the history of the house. Some of them could go back to the 1920s when the house was built. As we are a family of six with no dishwasher, we also get quite a few broken pieces of our own. In fact our dinner plates are all old, some from our parents and grandparents and whenever we see a nice old pattern in the charity shop we buy it, even if it is just one or two plates. In this way it does not matter when a plate breaks as we will be happy to recycle it in a mosaic project, and there are always replacements at the ready. Including old crockery, coins and memorabilia really makes your tiling project unique and personal. Our apologies as some images are slightly out of focus, but they will still give you an idea of the project.

 Fireplace 1

There were a couple of pipes going from the back boiler to the tank and we had to build a cover for them. When it was done it looked so much like a house, that we had no choice but to make it into one. To bring some energy into the design we decided to make swirls and spirals from all the small crockery pieces, representing movement and gusts of wind. All our white tiles were used as a calming background to the colourful swirls.

 Fireplace 2

For a job like this, the readymade tile adhesive you can buy in a big tub or bucket is the best thing. We used small plastic toothed spreaders, which you can get in your tile or hardware shop. It is a fiddly job but very meditative and rewarding. Keep checking that your work is flat by putting the palm of your hand against it. Only spread the adhesive over a small section at a time.

 Fireplace 3

When it was all set and dry we used the powdered grout, mixing some grey and white for a nice colour. Follow the instructions on the package and keep wiping all your little pieces carefully when the grout is half hard to remove it from the tops but leave it in the gaps. A second grouting might be necessary. We also added a big Ash log for a mantle piece.

 Fireplace finished.

Fireplace detail.

We found the lovely metal tiles around the frame in a tile skip outside our local tile shop. They were happy for us to take away as many tiles as we wanted, but please remember to bring gloves and ask politely if you are planning an excursion. We really hope you will get inspired to try a mosaic project of your own. A table top, flowerpot or pot stand will get you going and then there will be no stopping you.

Fireplace detail 2

Building a Gazebo with a living roof. Part 2.

winter 2014 259

Following on from our last post, with all the henge pieces nailed to the uprights we moved on to the roof. The easiest way to do that was to make a reciprocal roof. For this design you need an upright post called a ‘deadman’. The formula for the deadman = height of henge + ( diameter of roof beams (thin end) x number of roof beams ) this should stand on a block of wood that is easy to remove. With a reciprocal roof there is a hole in the middle where the beams do not touch. The smaller the hole the steeper the roof, the larger the shallower. We decided we wanted a 70 cm. diameter hole, so we put our deadman 35 cm. from the centre. The first roof beam goes from the top of one of the posts and leans on the deadman. The second roof beam leans on the first and we temporarily tied them together before nailing, to allow for some adjustments. We worked our way through to the last beam which is the tricky one as it goes over the previous beam and under the first. So all the beams are sitting on the one before. The following two pictures are from another roof but show the process clearly.

reciprocal roof.

Roof beams.

You can remove your deadman safely once all the beams have been nailed together and nailed to the top of the henges. Pre drilling the nail holes is advised to stop the wood from splitting. We left our deadman in place as the Leylandii is very springy and made a bouncy roof. We then strung polypropylene rope in a spiral to support the tarpaulin. We fixed it with wire staples to all the beams. We have not seen this technique used before but we wanted a cheap and easy way to have some support between the beams. It works well and we have since used it on our extension. The polypropylene does not break down as it is not exposed to UV light.

Roof with ropes.

Centre of roof.

The tarpaulin was draped over the ropes and cut off, leaving an excess overhanging the edges. We then rolled this around a piece of wood, in each section and nailed it on top of the beams. This makes a solid edge that stops the soil from washing away. We then covered it with a layer of material, we had been given some carpet backing that was suitable. You could use hessian, old canvas or old carpets. We covered this with a thin layer of soil and seeded it, the roots of the plants grew into the fabric and bound the roof together. We also used some bird netting to hold the soil in place while the plants were growing. It is still there and now the whole roof is very green and flowers grow all over it. We used Clover and mixed meadow flower seeds as well as the grass that was in the soil. This year we have added some Nasturtium seeds and we are hoping they will trail over the edge. We had some off cuts of wood that we used for low walls. On each upright we added a piece of wood to each side that we nailed the off cuts to.

Gazebo view.

Gazebo

For the floor we put down some quarry dust to level it and then a layer of permeable plastic weed control followed by a layer of Leylandii mulch. This has worked really well, with no weeds after nearly two years. This gazebo cost next to nothing. One bag of cement, one reinforcement-bar, tarpaulin, a coil of rope, some 4inch and 6inch nails, some 2×1 rolling pieces of wood and some flower seeds. All in all less than €100. A very low price to pay for a practical, beautiful and comfortable outdoor room. We use it all year around, for meals, playing music, having friends around and doing homework. Have a go, it is quite easy and fun. 

Gazebo in winter.

Building a Gazebo with a living roof. Part 1.

We live in the West of Ireland. It rains a lot here and we wanted somewhere to sit under cover in the garden. After we built our Gazebo, we discovered it was also a lovely place to sit in the shade on a hot summers day. When we moved in to our home it was surrounded with thick, tall Leylandii hedges. There was no light in most of the garden and the whole place felt very enclosed and cut off from the surrounding country side. We decided to replace the hedges with espalier Apple trees, Oak, Beech, Hawthorn, Hazel, Chestnut, Elder, and some other varieties. This is much better for wildlife.

Gazebo.

It left us with lots of cut down trunks and smaller branches. We mulched all the small bits for paths and the Gazebo floor. We used much of what was left to construct the Gazebo, choosing the most interesting shapes. This is a project much easier than it looks, so anyone can have a go. The main construction was finished in four days with only two of us working. A few of you could do it over a couple of weekends, giving you time for the concrete in the bases to set.

Start of by deciding how big you want it. Ours is about 3.5 meters across on the inside. Remember that a big Gazebo will require thicker wood. Put a stake in the middle and mark out a circle using a piece of string. Divide it into eight equal parts or any number you choose.

Construction.

Getting ready.

We put our uprights on bases as our original trees were trimmed to 1.8 meters. This left our timber a little short. You could do this or dig holes for your small concrete foundations. We put our bases straight on the ground using cardboard moulds. We lined these with stones and poured concrete in the middle with a piece of reinforcement-bar in the center protruding about 10 cm. We drilled a hole in the base of each post and just stood them on the bases. The next step is joining all the tops of the upright post with a ‘henge’ piece.

Concrete base.

In our next post we will tell you how we made our roof.

Posts up.

Building with tyres.

Before work commenced.
We have long been admiring Mike Reynolds and his Earthship designs, that started out in the 1970s in Taos, New Mexico, and has spread to many places across the world. The Earthship uses old car tyres as a major building component. When it was time to start the extension to our little cottage, we decided to build a semicircle tyre wall on the north and east side of the planned space. The purpose of the wall is to hold the earth-bank in place and protect the building from the worst of the elements. The first long, hard, but essential part of the construction was getting the drainage sorted out. We dug a ditch and added a perforated drainage pipe along with gravel and a permeable plastic sheet to protect it from clogging up. We then backfilled it with earth and levelled the whole area.

. Dranage

It is important to have a level and stable surface for your first layer of tyres. It takes about two whole wheel barrows of soil to fill one tyre. We had a lot of soil for this purpose as when we moved in, the area behind the house was sloping and had to be levelled out for the extension. Each layer consists of 25 tyres and we added 12 layers in total. Thankfully we had friends around for some of the backbreaking work of filling and emptying 600 wheelbarrows of soil for the wall and at least 800 more wheelbarrows of soil to fill the space behind the tyres, rebuilding the earth-bank. First few tyre layers.

The soil needs to be compacted into the tyre by pounding it with sledgehammers. You can use small lump hammers at first to get the soil into the rim and then fill it and pound in a circular motion across the top. We were not overly concerned about getting the tyres perfectly filled, as this is just a retaining wall that will be plastered over and not a part of the actual building. You do need to be careful though when choosing your tyres for each position and layer, as you are likely to have a selection of sizes. Think about your project as a giant jigsaw puzzle where you want each row to be as uniform as possible.

Getting there.

It is very rewarding to use a material that is a by-product of our modern society in a constructive way. Getting tyres is easy. If you go to ask at a tyre changing place, remember that you are in a position to bargain a bit. The place is likely to have to pay quite large amount of money to dispose of their tyres, so you asking for them is going to save them a lot of money. Ask politely if they can deliver them for free. They may even pay you a little bit to take them. We do not like to think about how much it would have cost us and the environment to build our wall out of a more commonly used material, like concrete blocks and cement.

Started roof construction.

The spaces in the wall are filled with old plastic flowerpots, drinking cans and plastic bottles etc. to save on the amount of render we are planning to use.

Wall with infill.